Location management
The article contains instructions for adding, configuring, changing and deleting a location.
Location management is performed on the main page of the platform. To open the main page, click on the DCImanager 6 logo in the upper left corner of the screen.
Adding a location
Before adding a location, make sure that the server for the location meets the requirements from the article Locations. General information.
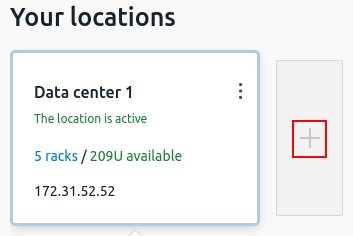
To add a location:
Click the + icon to the right of the blocks of created locations.
Specify the location settings:
- Name.
- IP address of the location server and its SSH-port. You can choose a server with DCImanager 6 for location.
- Connection settings:
- by password — specify User and Root-password to access the location server;
- by SSH key — click I want to use a public SSH key and add the content of the Public SSH key field to the ~/.ssh/authorized_keys on the location server.
- If the Inventory management module is installed in the platform, select the Inventory management warehouse.
- The name or number of the first rack. DCImanager 6 will automatically assign the numbers to all the racks that were added. Eg. if you enter the name myrack_1 and Number 3, DCImanager 6 will create 3 racks with the names myrack_1, myrack_2, and myrack_3.
- Number of racks in the location and Height of rack in units.
- Click the Add button.
Configuring a location
After adding a location, you have to configure it:
- select the templates that will be stored in the location;
specify the interfaces for the HTTP and DHCP server;

Utilizing several DHCP-servers may lead to errors when performing operations.
configure the NetFlow statistics collection settings;
If you enable NetFlow statistics collection:
- more disk space will be required on the platform server;
- the load on the platform server and location server may increase.
Before enabling NetFlow statistics collection, check that the network equipment allows data to be sent to the specified IP addresses and ports.
- enable event logging.
The configuration steps depend on the platform version — Hosting or Infrastructure.
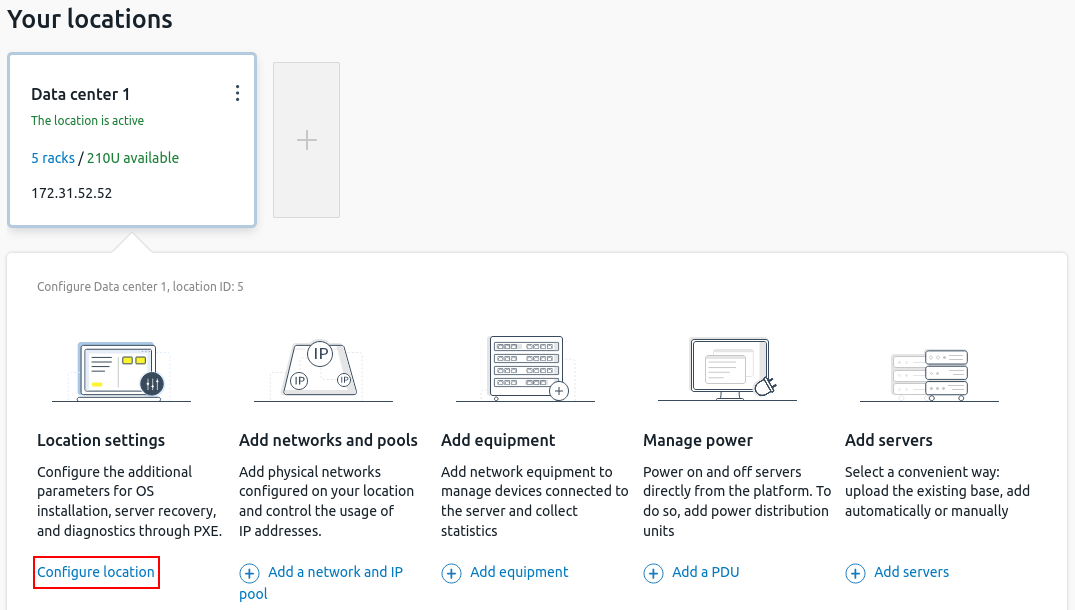
To configure a location:
- Click the Configure location button.
- If the DCImanager 6 Hosting version is installed on the server
If the DCImanager 6 Hosting version is installed on the server:
- Select the templates you need to keep at the location:
- Operating Systems (OS).
- Server diagnostics templates.
- Server recovery templates.
Select the DHCP interfaces where the DHCP server will run.
Select the Nginx IP addresses. Locations will use them to get the boot configuration file and send operation statuses. Specify IP addresses on the same physical networks as the DHCP interfaces.
- Select the templates you need to keep at the location:
If the DCImanager 6 Infrastructure version is installed on the server- If the DCImanager 6 Infrastructure version is installed on the server:
- Select the IP addresses of the HTTP server. The location will use them for internal services.
- If you are going to use location operations templates:
- Enable the option Configure parameters to perform the operations with servers through PXE.
- Select the templates you need to keep at the location:
- Operating Systems (OS).
- Server diagnostics templates.
- Server recovery templates.
- Select the DHCP interfaces where the DHCP server will run.
If you are planning to collect NetFlow statistics at a location:
Enable the Allow NetFlow statistics collection at the location option.
Select location IP for NetFlow — a list of location IP addresses to which the network equipment sends NetFlow/sFlow statistics.
- Specify the ports to collect statistics:
- NetFlow v5 port.
- NetFlow v9/v10 (IPFIX) port.
- sFlow port.
- To display NetFlow statistics in the server card, enable the Use default NetFlow statistics data option. If the option is disabled, the server card will display statistics on network connections, and NetFlow statistics will be available in the Grafana monitoring system.
- To enable Eventlog, activate the Allow log transfer to Grafana for servers with BMC: Redfish option. Read more in the Eventlog article.
- Click the Apply button.
After the created location block shows the status The location is active:
- Create the physical networks and pools.
- Add equipment to the location.
To change the specified settings, click the All settings button in the Location settings block.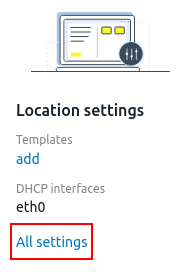
Changing location parameters
This section contains instructions on how to change the basic location settings — name, IP address, SSH settings.
If you have replaced the location server or reinstalled the OS on it, follow the instructions in the knowledge base article.
To change the main parameters of a location:
- In the block of the created location, click on the icon
 → Edit.
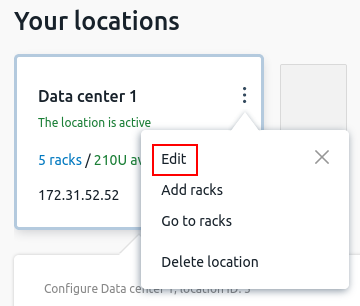
- Specify new location settings:
- Name.
- Placement Address.
- If the Inventory management module is installed in the platform, select the Inventory management warehouse.
- IP address of the location.
- SSH-port.
- Connection settings:
- by password — specify User and Root-password to access the location server;
- by SSH key — click I want to use a public SSH key and add the content of the Public SSH key field to the ~/.ssh/authorized_keys on the location server.
- Click the Save button.
Deleting a location
To delete a location:
- Remove the equipment from the racks of the location.
- In the block of the created location, click on the icon→ Delete location.
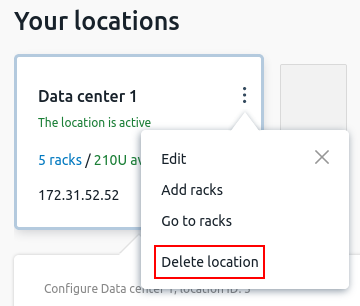
- Enter the location ID to confirm.
- Click the Delete button.
Useful tips
Related topics:- Locations. General information
- How locations work
- Templates management
- Racks
- NetFlow statistics collection
- Eventlog
Knowledge base articles: