Branding settings
BILLmanager supports branding — creating a unique design of the control panel web interface. Branding settings can be configured in the web interface of the billing system. A provider can edit the color scheme, upload the company's logo, configure copyright, and add unique HTML to the pages.
Branding settings
Go to Settings → Branding settings to adapt your control panel to your brand:
- Configure the interface color scheme
- Create window headers
- Add URL to the logo
- Uploads logos: Logo in the authorization form and address bar icon (favicon)
- Configure copyright parameters
- Add unique HTML to the pages.
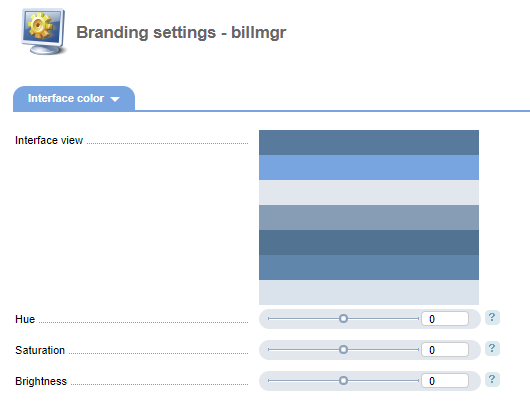
Interface color
Select a color for the BILLmanager interface. The selected color scheme will be used on all interface pages.
Logo
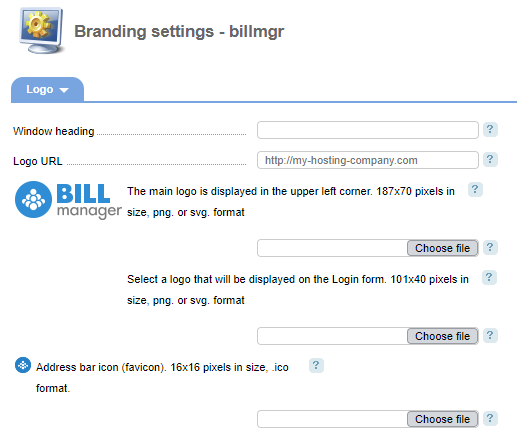
Window heading — the value will be used as a window header in a browser tab.
Logo URL — your client will be redirected to this URL when clicking on your logo.
Logo — select your main corporate logo that will be displayed in the upper left corner of the panel interface.
Logo in the authorization form — select a logo that will be used in the authorization form. The image should not be larger than 187x77 pixels and be in .png or .svgi.
Icon (favicon) — select an icon for the address bar that will be displayed before the page title. The image should not be larger than 16x16 pixels and be in .png or .svq.
Copyright
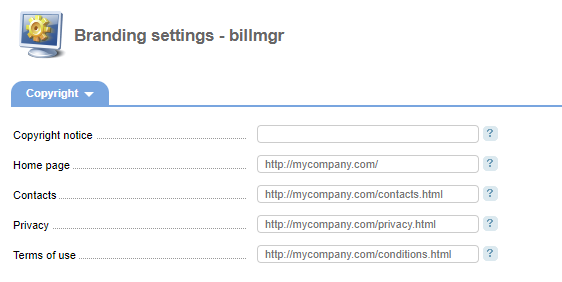
Copyright notice — it is displayed at the bottom of the control panel main menu and at the bottom of the authorization page. It specifies a legal person who has this copyright. It is a homepage link.
Homepage — company website. The specified page will be opened by clicking on the notice. In this field, you can use the $lang macro. This macro will change the language code.
For example, a website supports a few languages and your current language is defined by the directory: 'domain.com/ru'. If you will use "ru" instead of "$lang", your website will be opened with the same language as it is in BILLmanager.
Contacts — URL to your company's contact page. The link will be shown on the Login form. You can use the $lang macro in this field.
Privacy — link to your company's confidentiality terms. The link will be shown on the Login form. You can use the $lang macro in this field.
Terms of use — link to your product Terms and conditions. The link will be shown on the Login form. You can use the $lang macro in this field.
HTML
All control panel pages are created using HTML supplemented with css and javascript.
Use your unique HTML/css/ javascript and add it to the existing BILLmanager page code to create your unique BILLmanager style.
In Settings → Branding settings → HTML there are two fields: Heading and Body. The code from the first field will be added at the end of the heading block (<head></head>) for every page. The code from the second field will be added at the end of the body block (<body></body>) for every page.
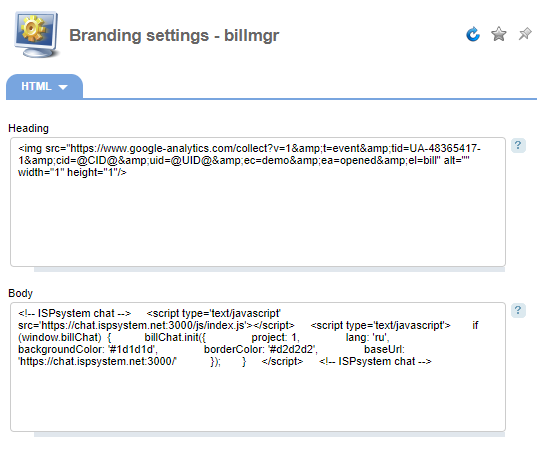
For example, to change the main menu font in the Heading field you can use the following code:
Menu sections changing
<style> li { font-size:12px; font-family:comic sans ms,cursive; font-style:italic; } </style>This code changes the standard item list appearance (<li> tag). It also specifies the font size of 12 pixels, applies comic sans ms font and activates italic font.
The main menu sections after adding this HTML:
You are able to change any tag style, style type or add interactivity to any element using HTML.
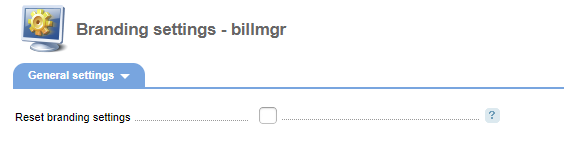
Reset settings
Reset all branding settings to default.
Multiple brand configuration
COREmanager
Owners of BILLmanager Corporate can use multiple projects (companies). Every provider can customize its unique BILLmanager interface design.
Multiple projects configuration is available only in COREmanager. It is the billing system core and it is presented as a separate control panel. To access COREmanager, replace 'billmgr' with 'core' in the BILLmanager control panel URL:
| URL BILLmanager | URL COREmanager |
|---|---|
| https://myprovider.com/ billmgr | https://myprovider .com/ core |
To authorize, use your superuser account (root by default) and its password.
How it works
Branding settings are located in Settings → Branding settings.
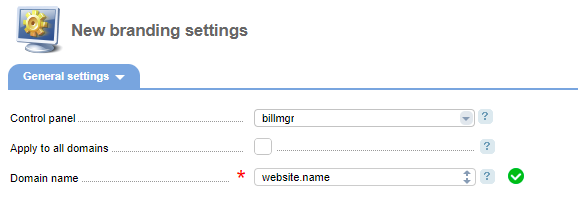
The section General settings allows you to set individual branding settings for a certain control panel:
Control panel specifies which ISPsystem control panel is to have the configured branding. You can select only the panels that were installed on the same server. The value "billmgr" means that configuration will be applied to BILLmanager itself.
Apply to all domains means that the specified branding settings will be applied regardless BILLmanager domain name. If this flag is unchecked, personal branding settings will be applied for every domain. Such configuration is required when you have to use different branding settings for different BILLmanager Corporate providers.
In Domain name you can specify a domain name of the provider. These branding settings will be applied only to this domain name.
For example, in the "Domain name" field you can specify the https://myprovider.com / address and specify branding settings in other fields that are different from the default. In this case, the settings would appear every time when BILLmanager opens from the https://myprovider.com / address.
You can set other branding settings for other domains in the same manner.
If your control panel is opened from the domain which doesn't have an individual branding setting, then the brand will be used that was configured in your BILLmanager administrator account.