Zabbix
Zabbix is an open source monitoring system. With Zabbix, you can configure monitoring of the platform server and location servers.
Main components of Zabbix:
- server — the component for managing network services, storing monitoring data, alerting the administrator about problems with equipment;
- agent — the software installed on the platform and location servers. The agent collects monitoring data and transmits it to the server.
Read more about Zabbix in the official documentation.
Installing Zabbix components
Server
Use a separate physical or virtual server for installation. If you are using VMmanager, you can create a virtual machine with the Zabbix server following this instruction.
Note
To ensure stable operation of DCImanager 6, we do not recommend installing the Zabbix server on the same server as the platform or location.
The system requirements for the server depend on the number of devices to be monitored.
Read more about installation and system requirements in the official Zabbix documentation.
Agent
We recommend installing Zabbix agents with Ansible:
- Install Ansible following the instructions of the official documentation.
Create the Ansible script zabbix_agent.yml:
Script content--- - name: Install Zabbix agent 2 hosts: all debugger: on_failed tasks: - name: Install zabbix-release CentOS 8 yum: name: https://repo.zabbix.com/zabbix/5.4/rhel/8/x86_64/zabbix-release-5.4-1.el8.noarch.rpm state: present when: ansible_os_family == "RedHat" and ansible_distribution_major_version == "8" - name: Install zabbix-release CentOS 7 yum: name: https://repo.zabbix.com/zabbix/5.4/rhel/7/x86_64/zabbix-release-5.4-1.el7.noarch.rpm state: present when: ansible_os_family == "RedHat" and ansible_distribution_major_version == "7" - name: Install zabbix release package apt: deb: https://repo.zabbix.com/zabbix/5.4/ubuntu/pool/main/z/zabbix-release/zabbix-release_5.4-1+ubuntu20.04_all.deb when: ansible_distribution == 'Ubuntu' - name: Install zabbix-agent2 package package: name: zabbix-agent2 state: present - name: Change Server IP lineinfile: path: /etc/zabbix/zabbix_agent2.conf regexp: 'Server=127.0.0.1' line: "Server=127.0.0.1,X.X.X.X" - name: Change Active Server IP lineinfile: path: /etc/zabbix/zabbix_agent2.conf regexp: 'ServerActive=127.0.0.1' line: "ServerActive=127.0.0.1,X.X.X.X" - name: Stop zabbix-agent2 service: name: zabbix-agent2 state: stopped enabled: no ignore_errors: yes - name: Start zabbix-agent2 service: name: zabbix-agent2 state: started enabled: yesYML- Replace "X.X.X.X" in the zabbix_agent.yml file with the IP address of the Zabbix server.
Add IP addresses of the platform server and location servers to the /etc/ansible/hosts file:
Example of configuration
host1 ansible_host=192.168.2.1 ansible_user=root host2 ansible_host=192.168.2.2 ansible_user=root host3 ansible_host=192.168.2.3 ansible_user=rootCODEComments192.168.2.1, 192.168.2.2, 192.168.2.3 — IP addresses of the platform server and location servers
Create an SSH key and copy the public part of the key to the platform and location servers:
Example of command
ssh-keygen -t rsa -b 4096 && ssh-copy-id -i ~/.ssh/id_rsa.pub root@<IP>BASHComments to the command<IP> — IP address of the server
Run the installation:
ansible-playbook zabbix_agent.ymlBASHOn the platform server and location servers, allow connections to port 10050/TCP for the Zabbix agent:
firewall-cmd --add-port=10050/tcpCODE
Zabbix server configuration
Adding a template
To add a Zabbix template:
Create the file dci_template.yaml:
File contentzabbix_export: version: '5.4' date: '2022-02-25T03:01:40Z' groups: - uuid: dc579cd7a1a34222933f24f52a68bcd8 name: 'Linux servers' templates: - uuid: a5ec933fdf8c41a5845bbb529a6a0f46 template: 'Template DCImanager 6' name: 'Template DCImanager 6' description: '2022-02-25 Monitoring of DCImanager 6 server and location servers by Zabbix agent' templates: - name: 'Linux by Zabbix agent' groups: - name: 'Linux servers' discovery_rules: - uuid: 40a0d2d3b69245a1bb151b7d28679c9b name: 'Location discovery' type: HTTP_AGENT key: location.discovery delay: 1d host_prototypes: - uuid: ce1aa235528b4b32b34eeaf6cfca4a8c host: 'DCImanager 6 Location {#LOCATION_NAME}' name: 'DCImanager 6 Location {#LOCATION_NAME}' group_links: - group: name: 'Linux servers' templates: - name: 'Linux by Zabbix agent' custom_interfaces: 'YES' interfaces: - ip: '{#LOCATION_IP}' url: '{$DCI_URL}/api/dci/v3/location' headers: - name: isp-box-instance value: 'true' - name: x-xsrf-token value: '{$DCI_TOKEN}' lld_macro_paths: - lld_macro: '{#LOCATION_IP}' path: $.ssh_address - lld_macro: '{#LOCATION_NAME}' path: $.name preprocessing: - type: JSONPATH parameters: - $.list macros: - macro: '{$DCI_TOKEN}' value: __TOKEN__ description: 'Auth token of admin in DCImanager 6' - macro: '{$DCI_URL}' value: 'https://__DCI_URL__' description: 'URL of DCImanager 6 instance'YMLCreate a token for authorization in the platform:
curl -s -X POST -H "accept: application/json" -H "Content-Type: application/json" -d '{"email": "admin@example.com", "password": "admin_pass"}' "https://dci6.example.com/auth/v4/public/token" -kBASHComments to the commandadmin@example.com — name of DCImanager 6 user with administrator permissions
admin_pass — user password
dci6.example.com — domain name or IP address of the platform server
Save the token value from the reply:
Example of reply
{"id":"69","token":"69-a56c5bd9-ba6b-489e-a670-c452cbdd3b70"}CODE- In the Zabbix interface:
- Enter Configuration → Templates → Import.
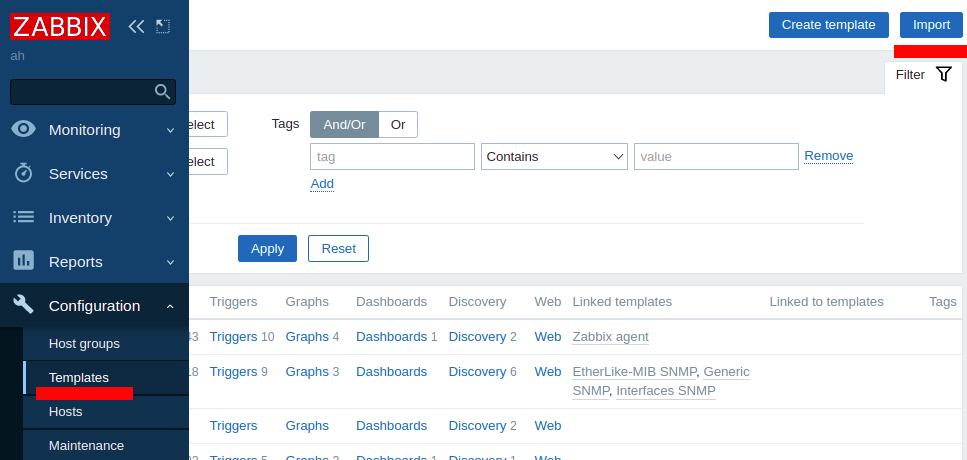
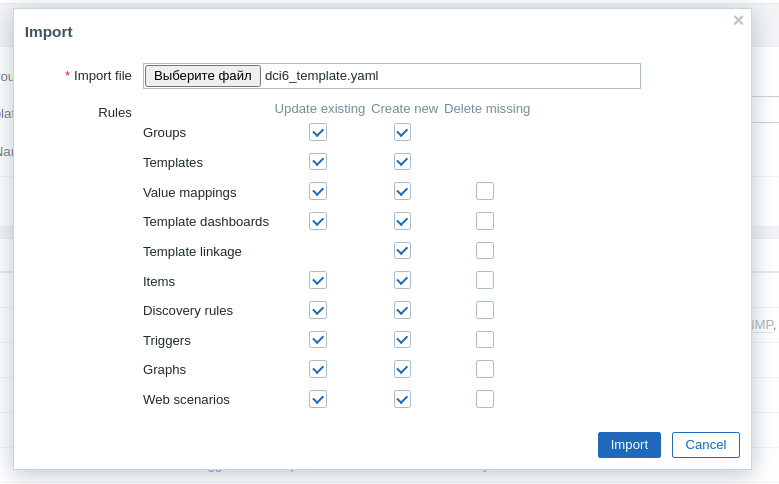
- Upload the dci_template.yaml file and press Import:
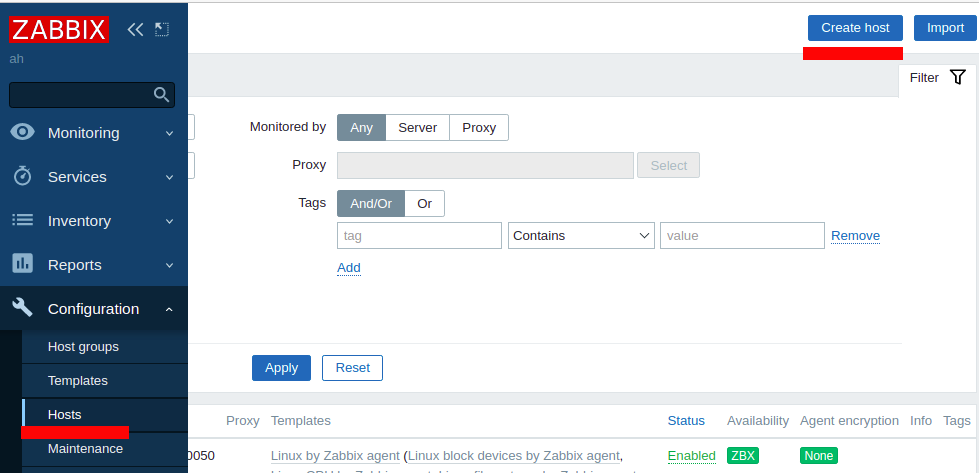
- Enter Configuration → Hosts → Create host.
- Specify the settings:
- Host name — discretionary name for designation of the server in the Zabbix database; for example, DCI6.
- Visible name — discretionary name for display of the server in the Zabbix database.
- Template — select the Template DCImanager 6 template.
- Groups — select object groups for monitoring. For example, Discovered hosts, Linux servers, Templates/Operating systems.
- Interfaces — network interfaces. Press Add → Agent.
- IP address — IP address of the server with the platform.
- DNS name — DNS server name. Leave the default value empty.
- Connect to — connection type. Select IP.
- Port — connection port. Leave the default value — 10050.
- Description — discretionary comment.
- Monitored by proxy — proxy used. Select (no proxy).
- Go to the Macros tab and add macros:
- {$DCI_TOKEN} — token for authorization in the platform
- {$DCI_URL} — URL of the platform server in the format https://dci6.example.com where dci6.example.com is the domain name or IP address of the platform server.
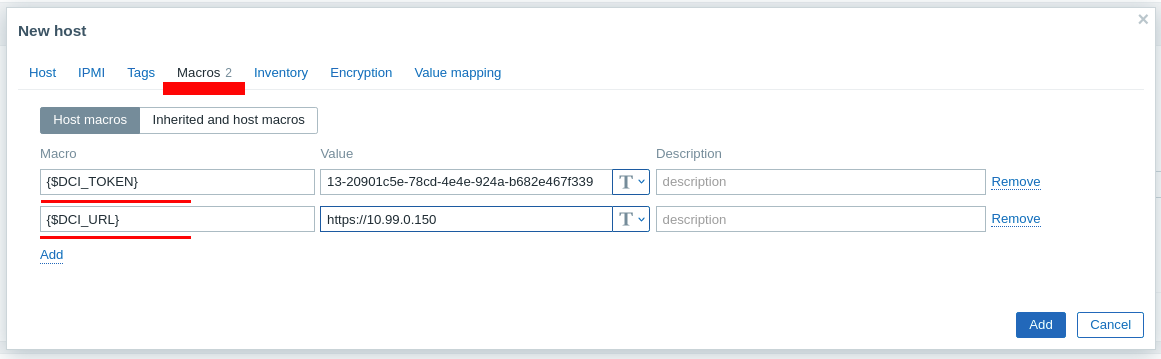
- Press Add.
- Enter Configuration → Templates → Import.
Changing the update interval
By default, monitoring data from locations will be updated once a day. To change the update interval in the Zabbix interface:
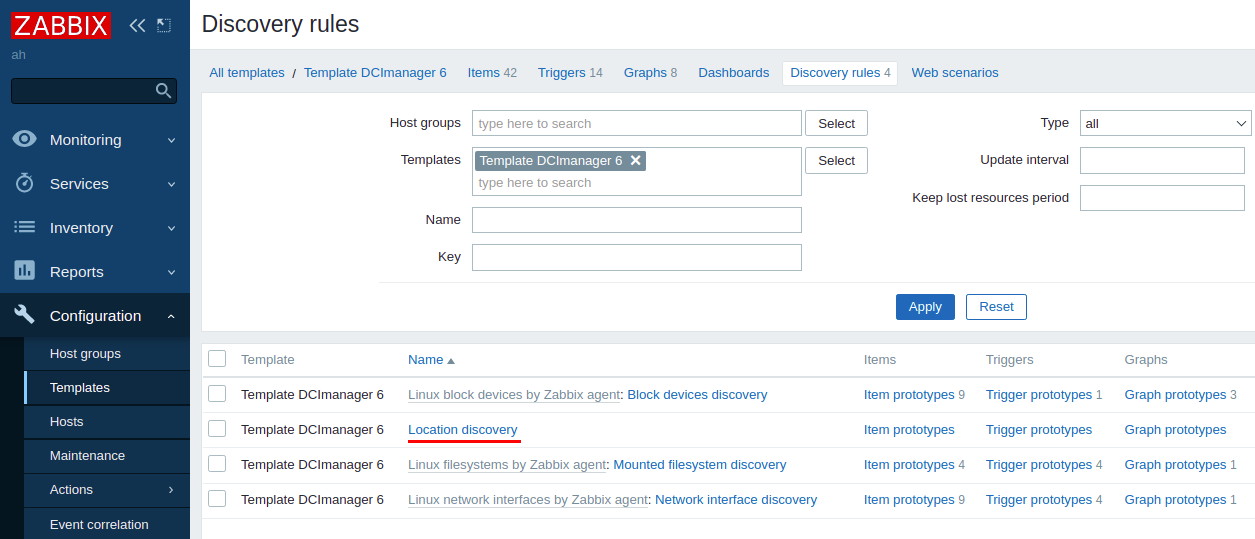
- Enter Configuration → Templates → select the Template DCImanager 6 template → Discovery.
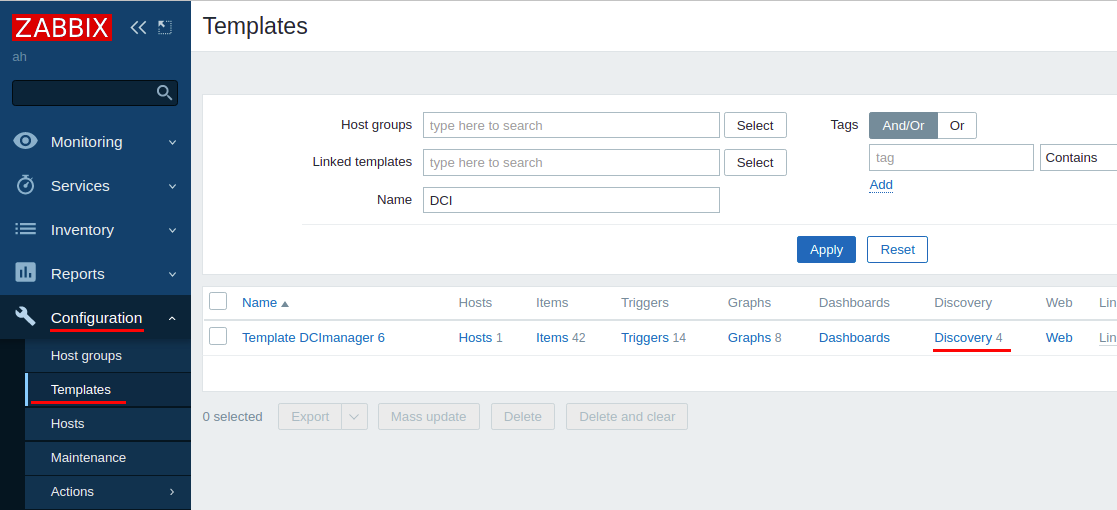
- In the list that opens, press Location discovery.
- Specify the interval value under Update interval.
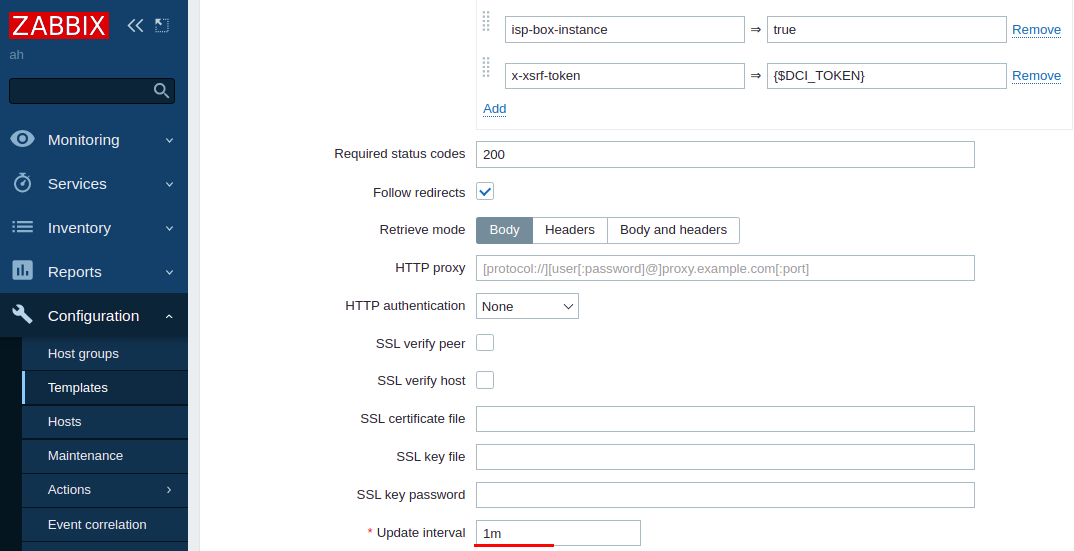
- Press Update.
Creating the dashboard
The Zabbix dashboard is an information panel, where you can add the graphs you need.

Example of dashboard
To create a dashboard:
- Enter Monitoring → Dashboard → Create dashboard.
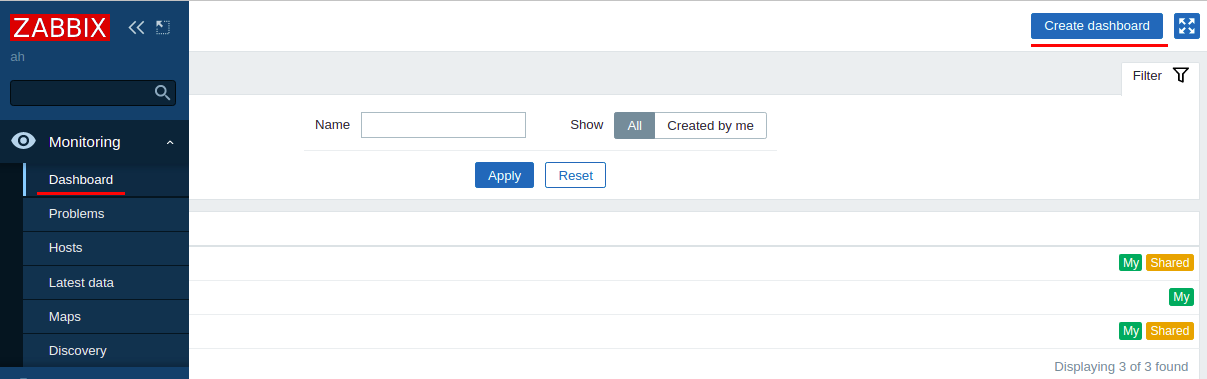
- Specify a discretionary dashboard name under Name.
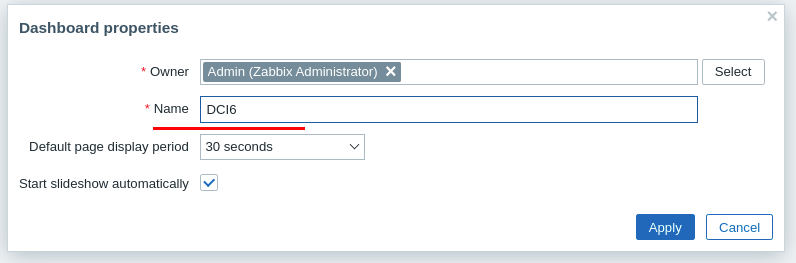
- Press Apply.
- To add a graph to the dashboard:
- Click in any empty space.
- Under Type, select Graph.
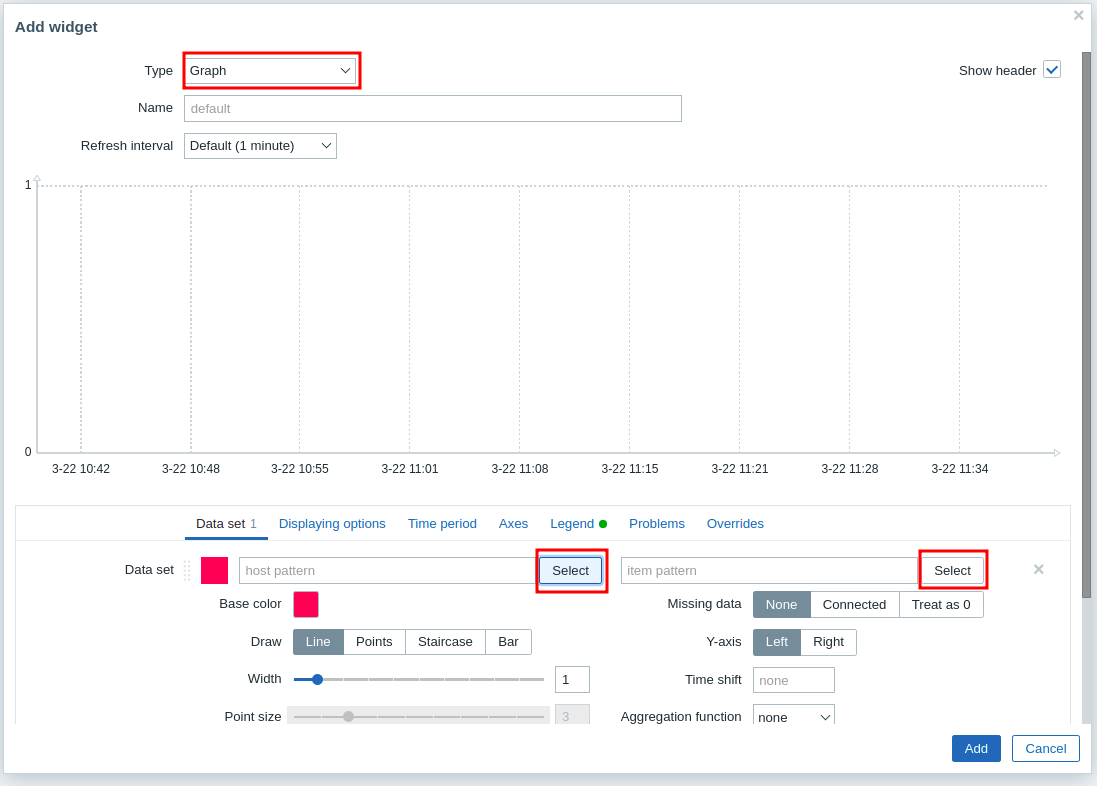
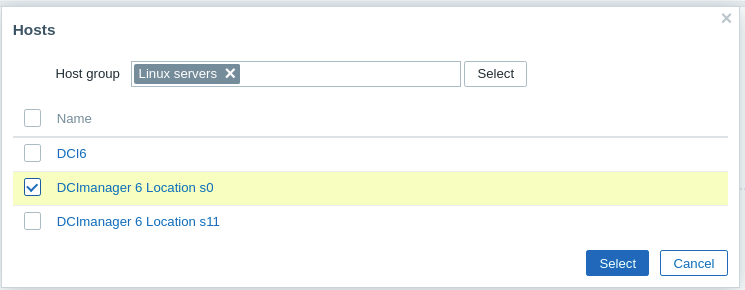
- Press Select to the right of the host pattern field and select the server to be monitored.
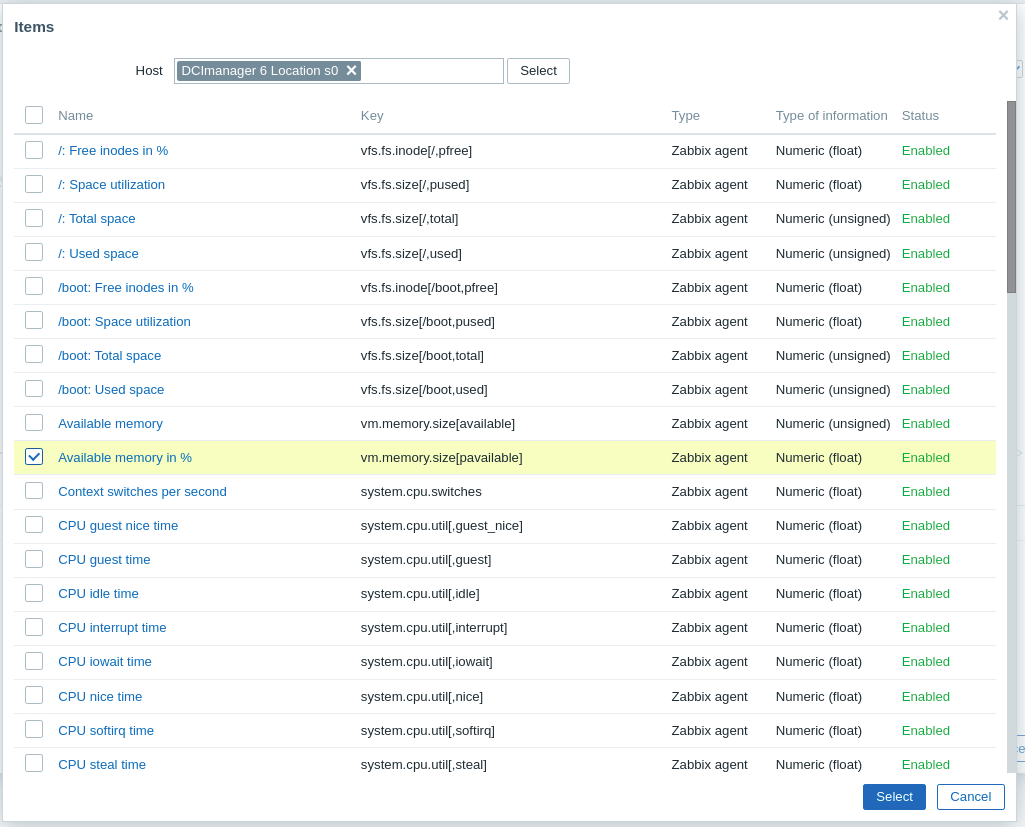
- Press Select to the right of the item pattern field and select the parameter for plotting the graph.
- Press Add.