Mounting an ISO image
You can mount an ISO image to a virtual machine (VM). For example, you may need this to install your own operating system (OS). The ISO image can be uploaded from a public URL or a local computer.
When installing an OS on a VM from an ISO image:
- running scripts will be available only after QEMU Guest Agent detects the OS type;
- changing the password will be available only after QEMU Guest Agent detects the OS type, or after the VM is shut down.
To back up such a VM correctly, enter Virtual machines → select the VM → ![]() menu → VM parameters → Fine-tuning settings → Resources and limits → Partition to expansion and specify the partition where the root file system is located.
menu → VM parameters → Fine-tuning settings → Resources and limits → Partition to expansion and specify the partition where the root file system is located.
ISO images management
To connect an ISO image:
- Enter Virtual machines → select the VM →
 menu → Mount ISO-image.
 - Select a method for uploading the image:
- From repository — select the ISO image from a connected repository;
- Local file — select the image file in iso format on your local computer;
- Image URL — enter the URL where the ISO image is available. The image can be available via HTTP(S) or FTP.
- To upload from a local file or URL:
- Select the OS type:
- Linux;
- Windows;
- FreeBSD;
- Other OS.
- Specify the Image tags for the connected OS if this VM needs to run scripts. The script will run on the VM if at least one of its tags matches the OS tag.
- Select the OS type:
- To avoid booting the VM from the image after connecting, disable the option Boot virtual machine from the ISO.
- If a NAS storage is connected to the cluster, you can save the image file to the repository. To do this:
- Enable the Save ISO image to repository option.
- Select a Repository.
- Specify the arbitrary Note.
Click Upload image. If this is the first ISO image to be attached to this VM, it will be rebooted. After uploading, you can connect to the VM via VNC or SPICE.

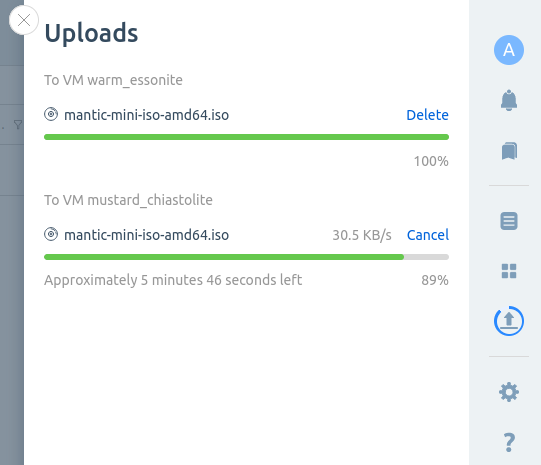
To view the image upload process, click on the VM status. The upload indicator will open in the drawer. In this drawer, you can Cancel the download.

If the ISO image is uploading from a local computer, the upload will be interrupted when the page is refreshed or closed in a browser.
To disconnect an ISO image:
- Enter Virtual machines → select the VM → menu → Unmount ISO-image.
- Enable the OS has been reinstalled option if you have installed the OS from this ISO image.
- Click Disconnect and restart. VMmanager will disconnect the ISO image and delete it. If the OS from the image was installed correctly, VMmanager will reboot the VM with the new operating system.
Upload manager
You can monitor and manage the process of uploading ISO images via the upload manager. To do this, click the ![]() icon in the right-hand menu.
icon in the right-hand menu.
Possible actions:
Cancel — cancel the image upload;
Delete — delete the upload record from the list;
Remove the completed uploads — delete all entries of completed uploads from the list.
Work logic
Access restrictions
Uploading an ISO image from a local computer may fail if the platform restricts access to users from certain IP addresses. To allow users to upload ISO images from a local computer, enable access to the platform from IP address 127.0.0.1 in the user group settings. Read more in the Restricting user access to the platform.
Keeping ISO images
- NAS storage is not used — ISO image files are uploaded to a directory for storing images and backups in the cluster storage. By default, this is the /image directory. When an ISO image is disconnected, its file will be deleted;
- NAS storage is used — ISO image files are uploaded to the /iso_images directory of the cluster storage. After disconnecting the ISO image, its file remains in the storage.
During the upload process, the file will have the extension .iso.part. When the download is successful, the extension changes to .iso. If a critical error occurs during the download, the partially downloaded image file will be deleted.
Connecting and disconnecting ISO images
VMmanager uses iPXE technology to connect an ISO image. This technology allows you to download only the necessary files during the installation process rather than downloading the entire image. The first time an ISO image is connected to a VM, a virtual CD drive is added to the VM's configuration file. The VM will be rebooted to update the configuration. The next time you connect and disconnect ISO images, the VM will not be rebooted. Connecting and disconnecting images will emulate inserting and removing media from the virtual CD drive.
If the option Boot virtual machine from the ISO is enabled when connecting an image, the VM will be rebooted from the virtual CD drive. If the option is disabled, the ISO image will be mounted as an additional disk of the VM.
If an ISO image is connected to the VM, all disk operations (migration, backups) will be blocked.
When ISO image is disabled, the virtual CD drive will remain in the VM configuration, but will not be used as a boot source.
Mounting ISO images
If the OS configuration on the VM is set to auto-mount disks, the connected ISO image will be mounted automatically.
To mount an ISO image manually:
- Connect to the VM via SSH.
Define the path to the virtual CD drive device:
lshw | grep cdromBASHExecute the command:
mount <path_to_cdrom> /mntBASHComments to the command<path_to_cdrom> — path to the virtual CD drive device. For example, /dev/cdrom
ISO image tags
When connecting an ISO image, you need to specify its tags and select the type of OS. The list of image tags is generated based on this information. The OS type is saved as the first item in the list. Possible tag values for the OS type are:
- linux — for Linux family operating systems;
- windows — for Windows;
- freebsd — for FreeBSD;
- other_os — for other operating systems.
For example, an administrator has selected the Linux OS type and specified the tags ubuntu, ubuntu22, my_os. This will generate a list of "linux, ubuntu, ubuntu 22, my_os".
The platform validates the tag list and removes conflicting values from it. For example, an administrator has selected the Windows OS type and specified the tags linux, windows11, debian. The list of tags "windows, linux, windows11, debian" will be formed. The linux tag refers to an OS and does not match the selected type, so it will be removed. The list will look like "windows, windows11, debian".
If the ISO image contains a Linux OS, one of the following values must be specified in the tags:
- for Debian-based operating systems — debian, ubuntu;
- for Red Hat based OS — redhat, centos, fedora, alma, rocky, oracle.
Based on the tag list, the IPv4 address addition model and OS type will be selected for the VM. For more details about the address addition model, see the article Managing VM IP addresses.
If the OS type and tags are correct, the platform will be able to perform some VM operations without installing QEMU Guest Agent software. Operations that require QEMU Guest Agent:
- creating anonymized images with Windows OS;
- running scripts on Windows VMs;
- changing VM password;
- adding an IPv4 address.
Possible issues with IP address allocation
If a VM was created without an OS and then the network configuration step was skipped when installing the OS from the ISO image, the platform will not be able to communicate with the VM. To solve the problem, synchronize the network settings on the VM and in the platform:
- Specify the network settings on the VM or delete the IP address of the VM in the platform interface.
- Wait for 15 minutes. The platform will poll the VM and get actual information about its settings.
Setting the maximum size of an ISO image
The platform administrator can connect ISO images of any size to the VM. By default, users and advanced users can connect ISO images with a maximum size of 8 GB. To change this value, in the right menu, click the ![]() icon → System information tab →
icon → System information tab →![]() icon next to Max. size of ISO to upload parameter → enter the required size in GB.
icon next to Max. size of ISO to upload parameter → enter the required size in GB.
You can also change the maximum size of ISO images via the API:
- Get the authorization token:
curl -k -X POST -H "accept: application/json" -H "Content-Type: application/json" 'https://domain.com/auth/v4/public/token' -d '{"email": "admin_email", "password": "admin_pass"}'CODEComments to the commanddomain.com — domain name or IP address of the server with the platform
admin_email — platform administrator's email
admin_pass — platform administrator's password
In response, you will get the message in the form:
Example of response in JSON
{ "confirmed": true, "expires_at": null, "id": "6", "token": "4-e9726dd9-61d9-2940-add3-914851d2cb8a" }CODESave the received token value.
Execute the API request:
curl -k -H "x-xsrf-token: <token>" -X POST "https://domain.com/vm/v3/settings/max_user_iso_size" -d '{"value":"<max_size>"}'BASHComments to the command<token> — authorization token
domain.com — domain name or IP address of the server with the platform
<max_size> — maximum ISO image size in MB
Useful tips
Related topics: