Integration with WHMCS
WHMCS is a billing system that allows a provider to sell different types of services. With WHMCS, he can provide dedicated servers to customers automatically. The billing system performs the following main features:
- registers clients and keeps track of their funds;
- creates tariff plans;
- accepts payments from customers;
- manages services automatically: activates, suspends, renews.
The integration is set up in WHMCS and DCImanager 6.
The integration module requires WHMCS version 8.
The integration module for WHMCS 8 was tested on version 8.8.0.
Install the module
To install the DCImanager 6 integration module, download the archive from the WHMCS directory and extract the integration module files:
cd /var/www/html/whmcs/
wget https://download.ispsystem.com/extras/whmcs/7/whmcs_isp_dci6.tar.gz
tar -xzvf whmcs_isp_dci6.tar.gzNext, log in to the WHMCS web interface and activate the module:
- WHMCS 7 — Setup → Addon Modules → the nodule ISPsystem global module → Activate;
- WHMCS 8 — System settings → Addon Modules → the nodule ISPsystem global module → Activate.
Set up the integration
To connect to DCImanager 6, click on Setup → Products/Services → Servers → Add New Server.
Servers
Configure the Servers section
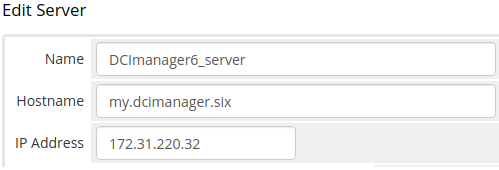
Enter the following parameters:
- Name — the name of the connection to DCImanager 6;
- Hostname — the name of the server with DCImanager 6;
- IP address — the public IP address of the server with DCImanager 6.
Server Details
Configure the Servers Details section
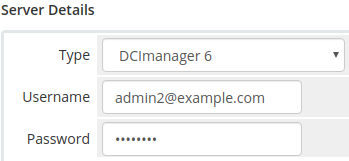
Enter the following parameters:
- Type — select "DCImanager 6";
- Username — enter the Admin username in DCImanager 6 that will manage servers in DCImanager 6;
- Password — enter the admin password.
Configure a tariff plan
To set up a tariff, go to Setup → Product/Services → Product/Services → Create a New Product.
Details
Configure the Details section
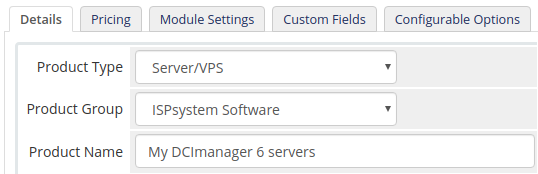
Enter the following parameters:
- Product Type — depending on the selected type, the service handling procedure may vary. Select "Server/VPS";
- Product Group — select a service group that will include the tariff on the order form;
- Product Name — enter the product name.
Module Settings
Configure the Module Settings section
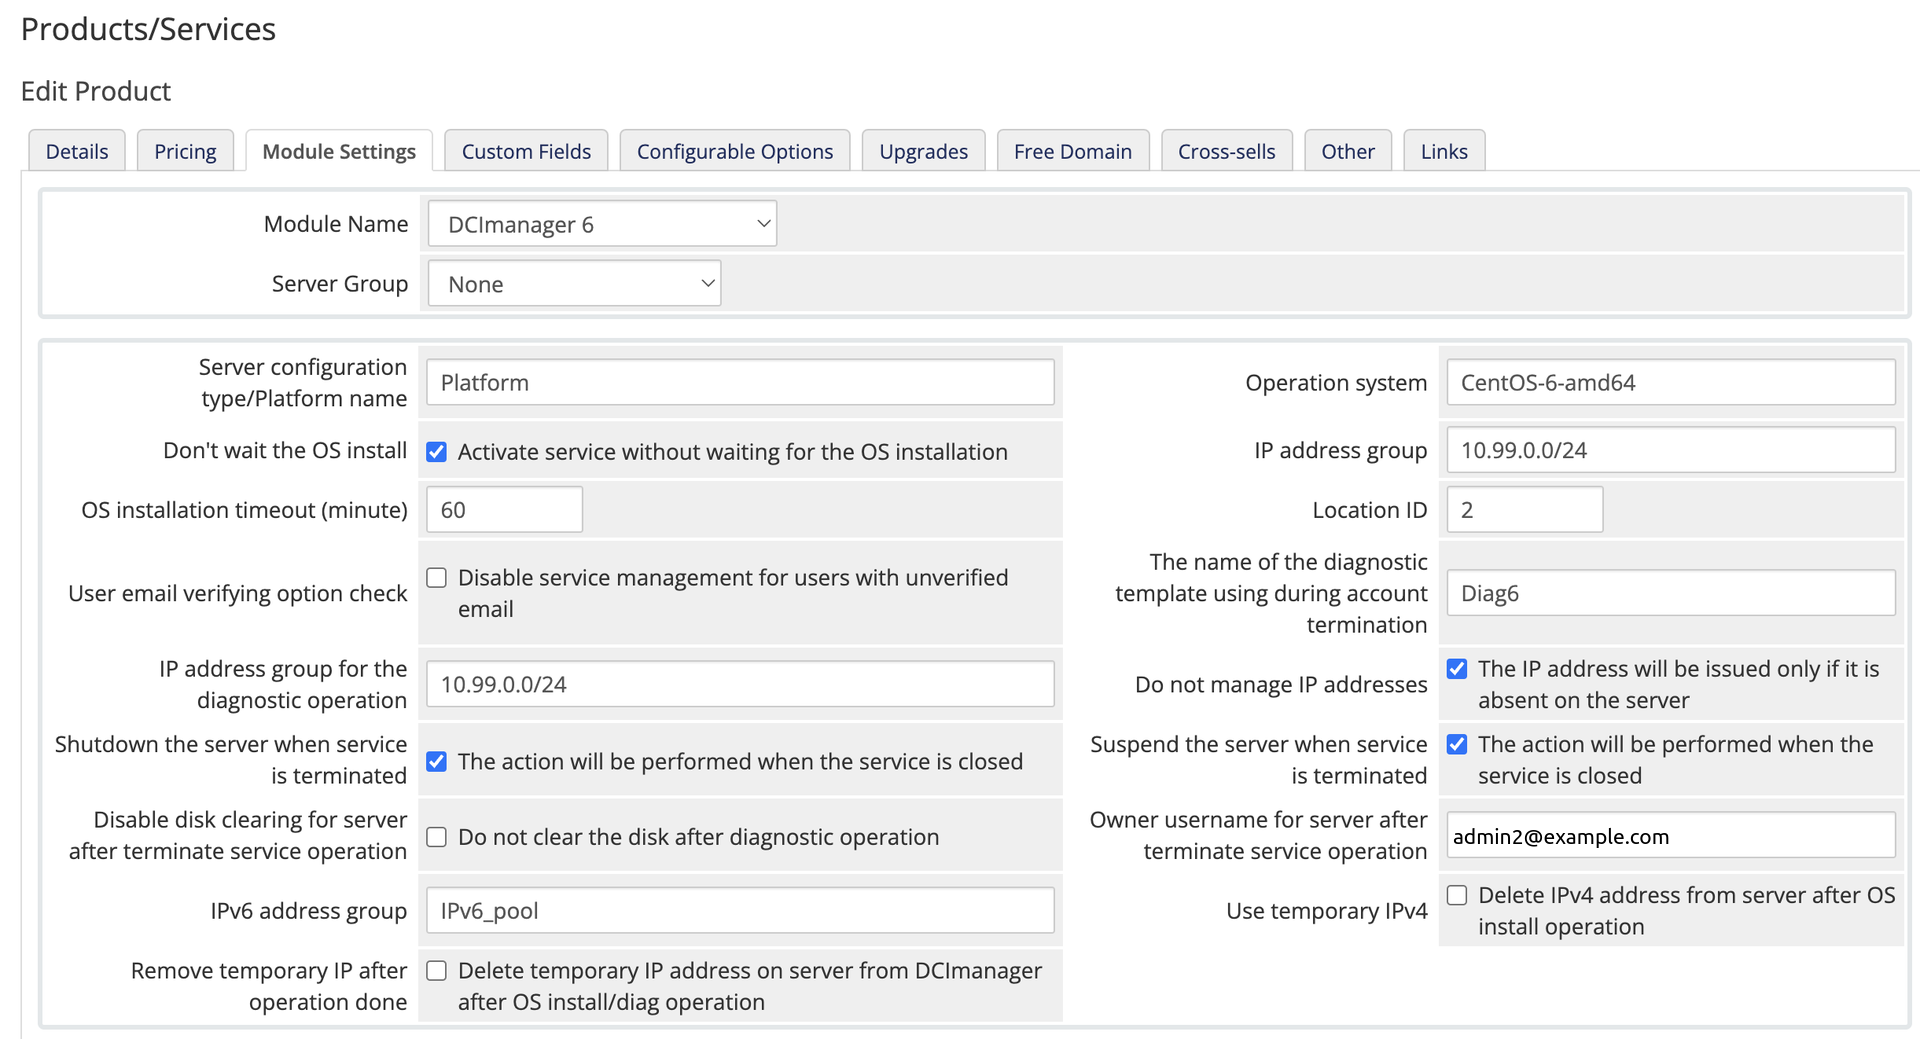
Enter the following parameters:
- Module Name — the integration method. Select "DCImanager 6";
- Server Group — service server group;
Server configuration type — server configuration name in DCImanager 6;

Run the diagnostics on the server to receive the server configuration name in DCImanager 6. Learn more in Running diagnostics.
- Operation system — OS template name in DCImanager 6;
- Don't wait the OS install — enable this option if you don't want to wait when the OS is installed during the order activation;
- IP address group — pool from DCImanager 6 for assigning IPv4 addresses to the server;
- OS Installation timeout (minute) — this parameter is used only if you have enabled the option Don't wait the OS install;
- Location ID — location ID in DCImanager 6. If the servers are located in different locations, leave the parameter empty. Otherwise, only servers in the selected location will be available for ordering;
- User email verifying option check — client email check. If this option is enabled, a client without a verified email will not be able to manage connected services through WHMCS. To notify the client of the need to verify email, go to Setup → General Settings → Security → Email Verification and enable the Request users to confirm their email address on signup or change of email address option.
- The name of the diagnostic template using during account termination — the name of the diagnostic template. We recommend using the Diag6 template;
- IP address group for the diagnostic operation — pool from DCImanager 6 for assigning IP addresses when running diagnostics;
Do not manage IP addresses — if this option is enabled, the integration module will not remove the server IPs. The new IP address will only be assigned if there are no IP addresses on the server;
- Shutdown server after service termination — if this option is enabled, the server will be shut down when the service is terminated;
- Suspend the server when service is terminated — If this option is enabled, DCImanager 6 will disable the switch ports to which the server is connected when the service is terminated;
- Disable disk clearing for server after terminate service operation — If this option is enabled, DCImanager 6 will not clear the server disks when terminating the service;
Owner username for server after terminate service operation — DCImanager 6 user name which will be assigned as the owner of the server when the service is terminated. If there is no such user in DCImanager 6, it will be created. If the parameter is empty, the server will not have an owner after the service has been terminated;

Username must be provided in the format user@domain.com.
IPv6 address group — pool from DCImanager 6 for assigning IPv6 addresses to the server;

When an IPv6 address or subnet is assigned to a server, an IPv4 address from the pool specified in the IP address group parameter will also be assigned.
- Use temporary IPv4 — if this option is enabled, the temporary IPv4 address will be removed from the server after the OS installation. In the platform settings, this address will remain allocated to the server;
- Remove temporary IP after operation done — if this option is enabled, all temporary IP addresses of the server will be removed in the platform settings after a successful OS installation.
Configurable options
Tariff add-ons in WHMCS are additional resources that clients can order for an extra fee. Such resources are billed separately from the main service. On the service order form, a client can select how much additional resources he wants to order.
Configurable options are combined into groups. Every group can be associated with several products. We recommend using a separate group with options for every connection to the platform.
To manage the options groups, go to Setup → Products/Services → Configurable Options. Add the following add-ons for a dedicated server:
- operating system:
- Enter "OS", "os" or "ostemplate" in Option Name. Other names are not supported.
- Choose "Dropdown" in Option Type.
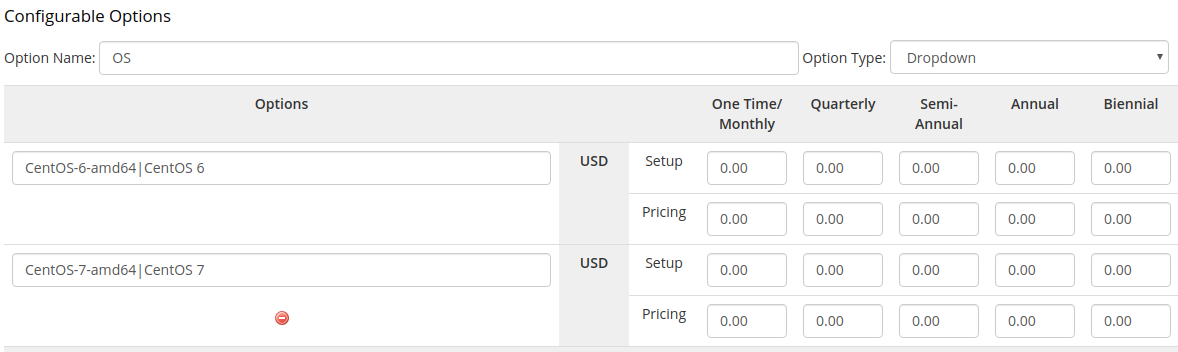
Configure "Operating system" option
- IP addresses and IPv6 subnets:
- In the Option Name field:
- for IPv4 addresses — enter "ip", "IP", "ipv4" or "IPv4". Other names are not supported;
- for IPv6 addresses or subnets — enter "ip6", "IP6", "ipv6" or "IPv6". Other names are not supported.
- Choose "Quantity" in Option Type.
- Enter number of IP addresses or subnets allocated to the server in Minimum Quantity Required. The minimum value is 1.
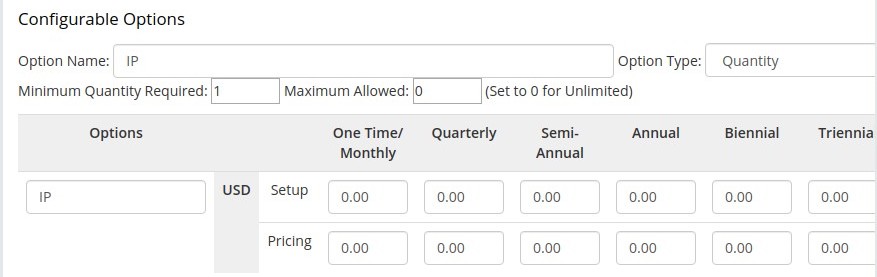
Configure "IP addresses" option
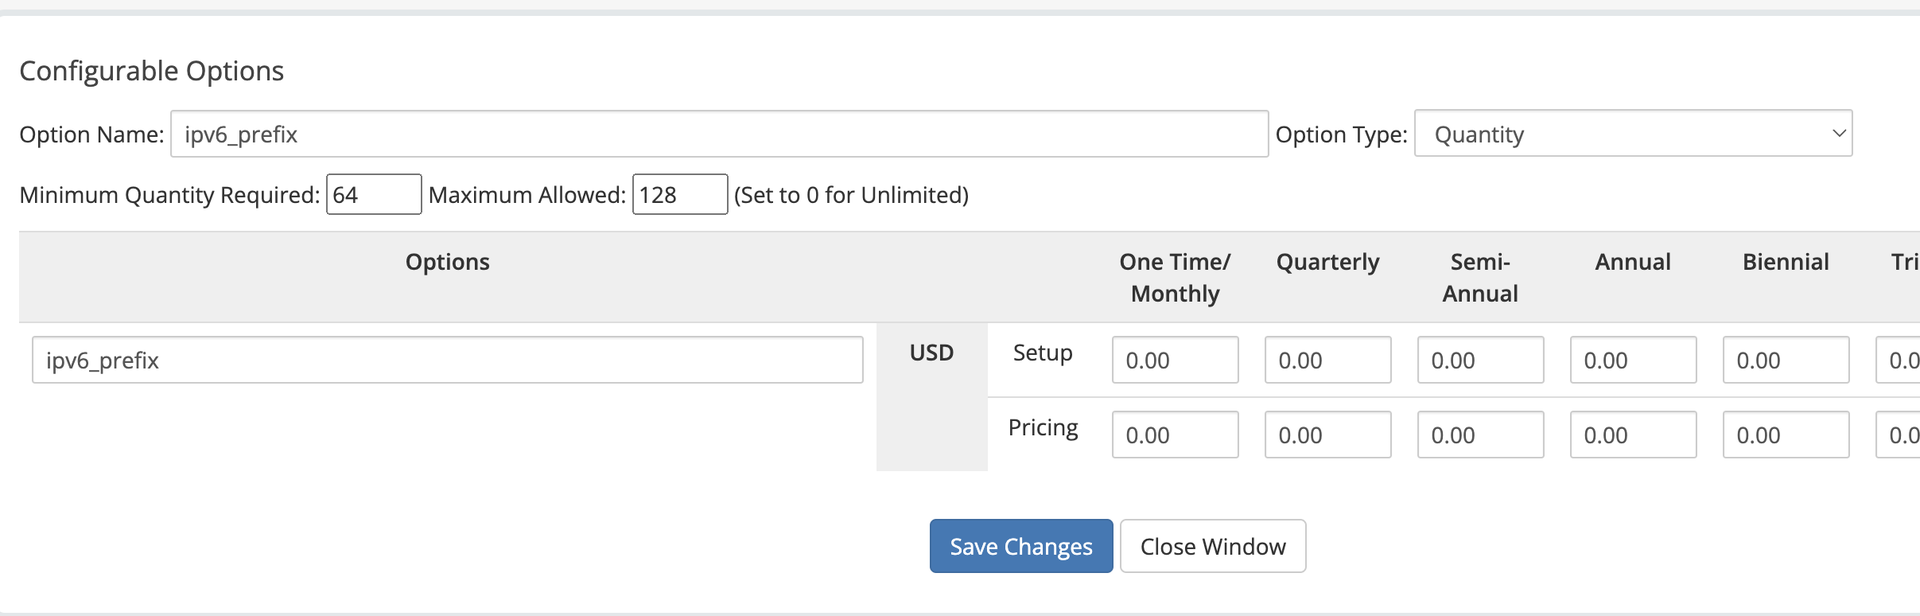
To allocate IPv6 subnets to the server, additionally create an option with settings:
- Option Name — "ip6_prefix", "IP6_prefix", "ipv6_prefix" or "IPv6_prefix". Other names are not supported
- Option Type — Quantity.
- Minimum Quantity Required — minimum subnet prefix. The minimum value is 64.
- Maximum Allowed — maximum subnet prefix. The maximum value is 128.
- In the Option Name field:
You can view the IP addresses assigned to the server in the service card:
- main IPv4 address — in the Dedicated IP field;
- additional IP addresses — in the Assigned IPs field.
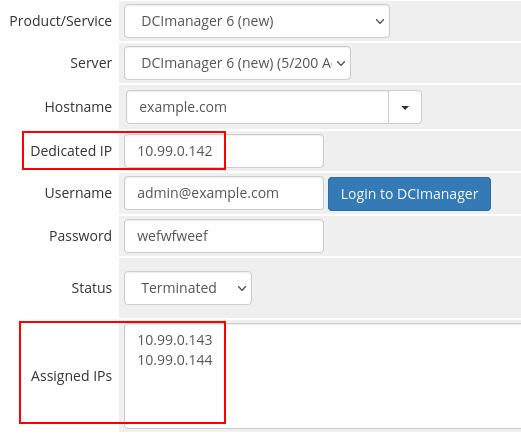
Example of a service card
If you change the IP addresses in the service card, the server IP addresses in DCImanager 6 will not change.
Provisioning of a specific server
For DCImanager 6 to provision a specific server when ordering a service, specify the server id from DCImanager 6 in the DCImgr server ID field in the service card. The option is available if the service has not been processed. To prevent the service from being bound to a specific server, leave the DCImgr server ID field blank.

Configuring the provisioning of a specific server
DCImanager 6 configuration
When deleting a service, the integration module runs server diagnostics and clears the hard drives. For correct service deletion perform the following steps:
- Make sure that the diagnostics process can be run on the server. Learn more under Running diagnostics.
- Create a pool of IP addresses:
- Go to Networks → IP pools → Create IP pool.
- Specify the arbitrary Pool name.
- In the IP address or range field, enter the range from which IP addresses will be allocated to the servers under diagnostics. The location with these servers must be accessible from the IP addresses.
- Enable the option Create a physical network.
- Specify the Network that the diagnostics module will use. The network must be included in the specified IP range.
- Enter the Gateway address for the network.
- Click on Create the pool.
- Mark the created pool of IP addresses as a diagnostic pool:
- Enter Network → IP pools → Pool general settings.
- Select the created pool in the Pools for deallocation of servers field.
- Press Save.
How the module works
Service activation
The integration module performs the following operations to activate a new service:
- Finds an available server with the following parameters in the DCImanager 6 database:
- server configuration matches the configuration specified in the parameter Server configuration type in the tab Module Settings;
- the server doesn't have an owner;
the last operation with the server was completed successfully or was canceled.
If in the DCImgr server ID field of the service card the server id is specified, only this server can be issued to the user. If the server with this id already has an owner, service processing stops with the error "The selected server is already in use".
Searches the DCImanager 6 user by the Email specified in the WHMCS account settings. If the user with that email doesn't exist, the system will create a new one. If a user with administrator rights is found, returns an error message.
- Makes the user the server owner.
- Enables ports of the switch connected to the server.
- Powers the server on if needed.
- Terminates an operation on the server if any.
Removes IP addresses from the server configuration if Do not manage IP addresses option is disabled.
Adds to the server configuration a new IP address from the pool specified in the IP address group parameter on the Module Settings tab. The new IP address will be assigned if Do not manage IP addresses option is disabled or there are no IP addresses on the server.
- Runs the OS deployment operation.
- Waits when the operation is completed if the option Don't wait the OS install is disabled. When the timeout specified in the parameter OS Installation timeout (minute) is over, it completes the deployment operation.
Service suspension
When suspending a service, DCImanager 6 powers off switch ports connected to the server. The service cannot be suspended if switch ports were not specified in the server settings form.
Service re-activation
To activate a service, DCImanager 6 powers on switch ports connected to the server.
Service deletion
When deleting a service, the integration module performs the following operations:
- Powers on the switch ports connected to the server.
- Powers on the server if needed.
- Terminates a running operation on the server if any.
- Deletes the IP addresses from the server configuration.
- Assigns the owner of the server status to the DCImanager 6 user specified in the Owner username for server after terminate service operation. If there is no such user in DCImanager 6, it will create it. If the value of the parameter is empty, DCImanager 6 will delete the server owner details.
- Launches diagnostics with the option to clear disks. If the Disable disk clearing for server after terminate service operation option is enabled, disks will not be cleared. If diagnostics is not completed within 60 minutes, with the option Shutdown server after service termination enabled, the operation will be forcibly terminated.
- Shuts the server down if the Shutdown server after service termination option was active.
- Disables the switches of the port to which the server is connected if the Suspend the server when service is terminated option was active.
Logs
The log file of the integration module is located in WHMCS → Utilities → Logs → Module Log.
If the log file contains errors like "Module Create Failed", check whether the integration module is activated.
Useful tips
Related topics: