Creating a disk image
A user image is a virtual machine disk image that is used for creating new virtual machines or as a backup copy. A VM image can be anonymized. When anonymizing, personal information is removed from the image: user data, settings, passwords, etc.
Image files are created in the image storage directory (by default — /image/). Before creating an image, make sure that there is enough free space on the partition with this directory.
Features of anonymized images
Unix
The user image is created using the virt-sysprep utility. The utility is run with the --operations defaults,ca-certificates,kerberos-data,user-account parameter. The following will be removed from the original VM:
- /home/ directory;
- /var/log/ directory;
- manually created user accounts;
- automatically generated error reports from the /var/spool/abrt/ directory;
- *.bak and *~ backup files;
- bash interpreter history;
- data on block device identifiers from the /etc/blkid.tab file;
- kexec-tools utility data;
- cron jobs;
- DHCP client and server databases;
- Dovecot mail server data;
- IPA data;
- Kerberos data;
- keytab file for Kerberos authentication;
- unique identifier of the local system — machine ID;
- emails from the local directory;
- HOSTNAME and DHCP_HOSTNAME parameters from the network configuration;
- MAC address information;
- NetworkManager connection profiles;
- process accounting log files;
- package manager cache;
- PAM (pluggable authentication module) data;
- puppet utility data and log files;
- Red Hat subscription data;
- RHN (Red Hat Network) system id;
- RPM databases;
- Samba databases and log files;
- SSH keys;
- .ssh directories;
- sssd database and log files;
- temporary files in /tmp/ and /var/tmp/ directories;
- udev manager network rules;
- utmp file;
- UUID of yum manager;
- CA certificates.
If the VM is configured with LVM storage, the UUIDs of its physical disks (PV) and volume groups (VG) will be changed.
Windows
The user image is created using the sysprep utility. The utility is run with parameters:
- /generalize — removes all unique system information, SIDs, restore points, and logs;
- /oobe — enables OOBE mode (first system startup);
- /shutdown — shuts down the VM after the utility completes;
- /unattend — defines an answer file. For more information, see Answer files for OS Windows images.
Creating images
You can create an image in the VM images or Virtual machines section.
The network settings specified in the virtual machine are not written to the VM image. Only the number of added IP addresses is taken into account. Therefore, when creating a virtual machine from the image, new free IP addresses will be assigned to it.
In the VM images section
- Go to Templates → VM images → Add button.
- Select the Virtual machine to create the image from.
Specify the image settings:
- By default, the New image name will be generated in the following format: <virtual machine name>_<current time in UNIX format>. To update the timestamp in the generated title, click the generate button. You can specify an arbitrary name for the image.
- Select an Image owner.
- Select the users who can Access the newly created image: Owner only or All.
- If you need to remove unique information from the source VM, enable the Anonymize the image option.
For Windows images, upload the Windows sysprep answer file. The platform will verify that the XML markup in the file is correct. If the markup is correct, the form will display the file name with the
 icon . If the answer file is not formatted correctly, a warning will be displayed on the form. To delete an uploaded file, click the
  icon.
icon.
If the Anonymize the image option is enabled and the answer file is not uploaded or is corrupted, the image will be created with the platform's standard answer file. For more information, see Answer files for OS Windows images.
- Specify an arbitrary Note.
Select Storage for the image.
If NAS storage is connected to the cluster, only file and NAS storage will be available for selection.
- Click Create button.
In the Virtual machines section
- Go to Virtual machines →
 menu → Create VM image.
 - Specify the image settings:
- By default, the New image name will be generated in the following format: <virtual machine name>_<current time in UNIX format>. To update the timestamp in the generated title, click the generate button. You can specify an arbitrary name for the image.
- Select an Image owner.
- Select the users who can Access the newly created image: Owner only or All.
- If you need to remove unique information from the source VM, enable the Anonymize the image option.
For Windows images, upload the Windows sysprep answer file. The platform will verify that the XML markup in the file is correct. If the markup is correct, the form will display the file name with the
icon . If the answer file is not formatted correctly, a warning will be displayed on the form. To delete an uploaded file, click the icon.
If the Anonymize the image option is enabled and the answer file is not uploaded or is corrupted, the image will be created with the platform's standard answer file. For more information, see Answer files for OS Windows images.
- Specify an arbitrary Note.
Select Storage for the image.
If NAS storage is connected to the cluster, only file and NAS storage will be available for selection.
- Click Create button.
Managing images
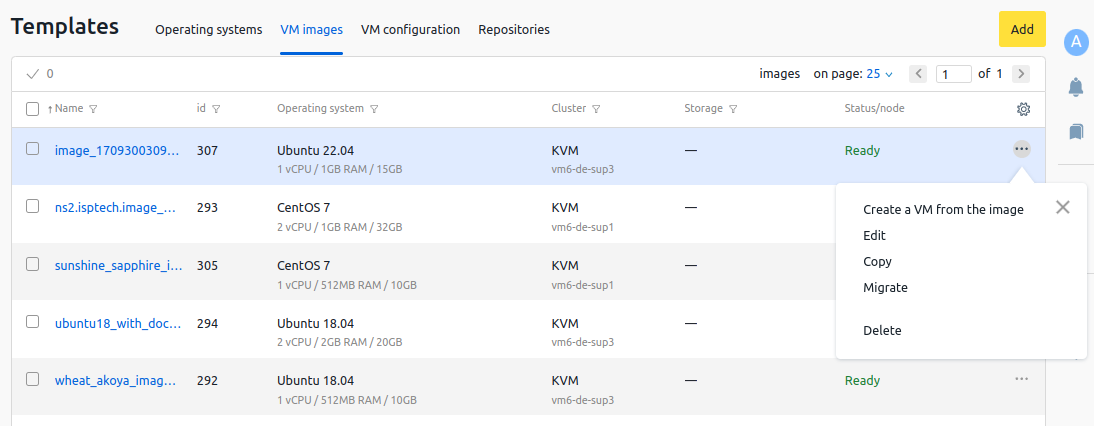
To manage images, go to Templates → VM images → select an image → ![]() menu . Possible actions:
menu . Possible actions:
- Create a VM from the image;
- Edit — change image settings;
- Copy — copy the image to another cluster node;
- Migrate — move the image to another cluster node;
- Delete.
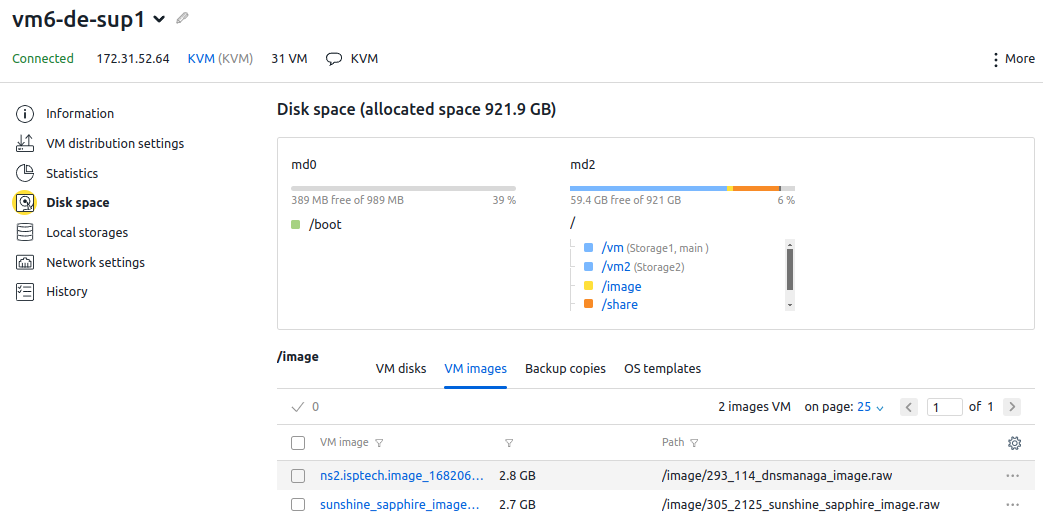
You can also manage images in the card of the node on which the images are stored. To do this, go to Nodes → select a node → Disk space → VM images tab → select an image → ![]() menu.
menu.
Useful tips
Related topics:Knowledge base articles: