Restricting user access to the platform
You can allow the platform users to log in only from specific IP addresses and subnets:
- Create user groups in the platform.
- Specify for each group the list of allowed IP addresses.
If the platform user is a member of the group and tries to log in from an IP address that is not listed in the group settings, the platform will block the user's access to the login service.
If the user is not a member of any of the groups, he/she can log into the platform from any IP address.
Managing user groups
To manage groups, enter Users section → User groups tab.
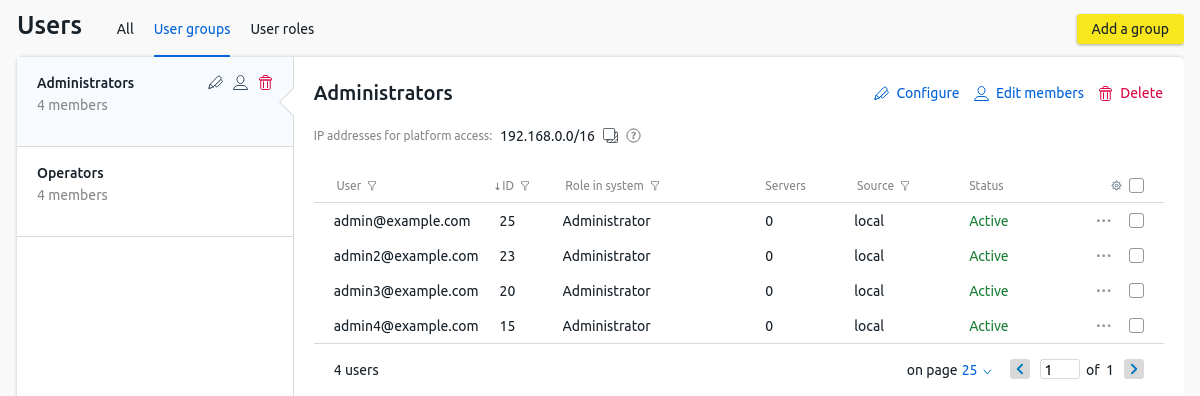
Section interface
To create a group:
- Click Add a group button.
- Specify the group parameters:
- Name.
- IP addresses for access to the platform . The list can contain individual IP addresses, ranges and subnets of IP addresses.
- Click Save button.
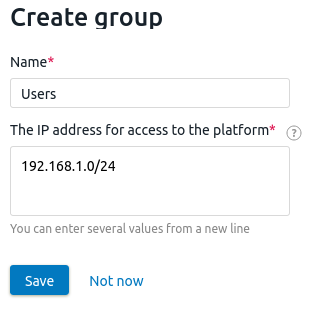
Example of creating a group
To change the settings of the created group, click the ![]() icon.
icon.
To delete a group, click the ![]() icon.
icon.
To add or delete users from a group:
- Click the
 icon.
icon. - Select the users you want to add.
- Uncheck the users you want to delete.
- Click Save changes button.
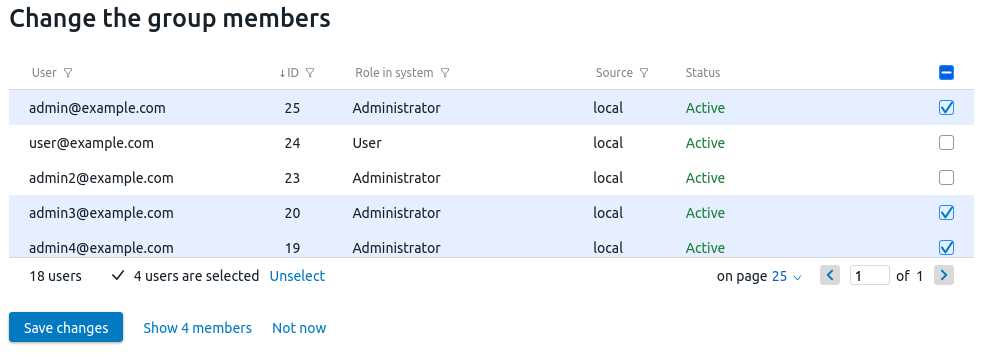
Example of editing group members
Access control via API
The platform creates an access control list (ACL) for each user group. The ACL contains the group members' emails and lists of allowed IP addresses.
Creating an ACL
To create an ACL:
Get an authorization token:
curl -k -X POST -H "accept: application/json" -H "Content-Type: application/json" 'https://domain.com/auth/v4/public/token' -d '{"email": "admin_email", "password": "admin_pass"}'CODEComments to the commanddomain.com — domain name or IP address of the server with the platform
admin_email — platform administrator's email
admin_pass — platform administrator's password
In response, you will get the message in the form:
Example of response in JSON
{ "confirmed": true, "expires_at": null, "id": "6", "token": "4-e9726dd9-61d9-2940-add3-914851d2cb8a" }CODESave the received token value.
Execute the request:
curl -H 'x-xsrf-token: <token>' -X POST https://domain.com/auth/v4/acl -d '{"name": "<acl_name>", "ip_list": [<ip>], "members": [<users_id>]}'CODEComments to the command<token> — authorization token
domain.com — domain name of the server with the platform
<acl_name> — ACL name
<ip> — list of allowed IP addresses. The list can contain individual IP addresses, ranges and subnets of IP addresses. Each value of the list must be specified in quotation marks
<users_id> — list of the platform user IDs. Each value of the list must be specified in quotation marks

Note:
You can view the user IDs in the interface of the platform in the Users section.
The response will contain the ID of the created ACL.
Example of creating an ACL
curl -H 'x-xsrf-token: 4-e9726dd9-61d9-2940-add3-914851d2cb8a' -X POST https://domain.com/auth/v4/acl -d '{"name": "admin1", "ip_list": ["192.0.2.1","192.0.2.10-192.0.2.20","192.0.2.100/28"], "members": ["1","3","7"}'CODEComments to the exampleThe request will create an ACL named admin1. Users with id 1, 3, 7 will be allowed access to the platform from IP-addresses 192.0.2.1, 192.0.2.10-192.0.2.20 and subnet 192.0.2.100/28.
Example of response
{
  "id": "12"
}
CODE
Viewing an ACL
To view all created ACLs, execute the request:
curl -H 'x-xsrf-token: <token>' GET https://domain.com/auth/v4/acl<token> — authorization token
domain.com — domain name of the server with the platform
To view a specific created ACL, execute the request:
curl -H 'x-xsrf-token: <token>' GET https://domain.com/auth/v4/acl/<acl_id><token> — authorization token
domain.com — domain name of the server with the platform
<acl_id> — id of the created ACL
Example of response
{
  "ip_list": [
    "192.0.2.1",
    "192.0.2.10-192.0.2.20",
    "192.0.2.100/28"
  ],
  "name": "admin1",
  "users": [
    "user1@example.com",
    "user3@example.com",
	"user7@example.com"
  ]
}Deleting an ACL
To delete a specific created ACL, execute the request:
curl -H 'x-xsrf-token: <token>' -X DELETE https://domain.com/auth/v4/acl/<acl_id><token> — authorization token
domain.com — domain name of the server with the platform
<acl_id> — id of the created ACL
If the ACL is deleted successfully, the response will contain "true".
If access to the platform is lost
Note
This section contains commands for modifying the platform database. It is recommended to create a backup copy of the platform before performing these actions.
If access to the platform is lost due to errors in the ACL settings, you can remove the ACL from the platform database:
- Connect to the server with the platform via SSH.
Connect to the platform database:
docker exec -it mysql bash -c "mysql <database> -p\$MYSQL_ROOT_PASSWORD"BASHComments to the command<database> — database name, depending on the platform type:
- VMmanager — isp
- DCImanager 6 — auth
Perform the request:
select * from auth_user2acl;SQLExample response
+----+------+-----+ | id | user | acl | +----+------+-----+ | 3 | 122 | 4 | +----+------+-----+CODESave the value from the id column.
Perform the request:
delete from auth_user2acl where id=<id>;SQLComments<id> — the value of the id column from the response to the request in step 3