The User VLANmodule makes it possible to allocate virtual networks for user servers. In the module settings, the VLAN range, which will be available to users, is set. Read more aboutVLAN.
Installing and configuring the module
In the right menu, click the icon → Modules → User VLAN → Install button.
Wait until the module is installed and click the Configure button.
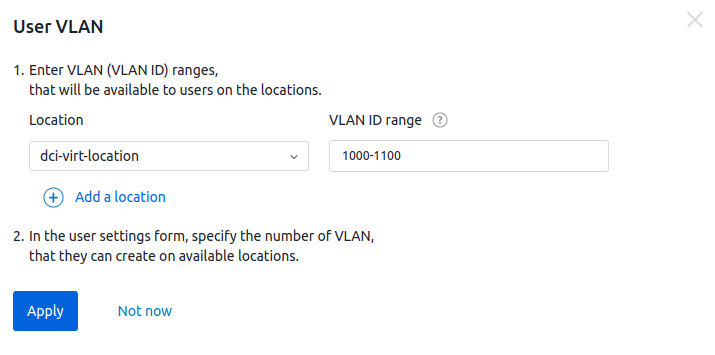
Select the Location for which you need to specify the range of custom VLANs.
Enter VLAN IDs in the VLAN ID range field that will be available to users at the selected location. You can specify several separate VLAN IDs or ranges separated by commas or spaces. For example, 1-15, 29, 50, 333-400.
If you need to use the users VLANs on different locations, click the Add a location button and specify the VLAN settings. To remove a setting for a location, click the icon.
Click Apply button.
Configuring user accounts
To enable a user create a VLAN:
Enter Users sections → select the user → menu → Configure user VLAN.
Specify the VLAN numberthat this user can create.The maximum value should not exceed the number of VLANs allowed at that location.
Click Save button.
VLAN configuration in the user interface
To configure a VLAN on a switch interface, the user needs to:
Go to Servers section → select a server → Connected devices tab→ select the switch port.
Select an existing VLAN or create a New VLAN. Enter a name for the new VLAN.
Enter a discretional Note.
Click Save button.
Deleting a module
To delete the module, in the right menu, click the icon → Modules → User VLAN → Delete module button.
When the module is deleted, all VLANs will be released from their owners. Server owners will not be able to view and manage VLANs. All created VLANs will remain on the switch ports.