Payment in client area
Depending on the provider's settings, two types of payments are available in your client area:
- advance payment — you top up the balance of the Personal account in any convenient way, and then pay for services with it. You can also enable auto-renewal from your Personal account and thus configure auto-payment for your services;
- payment for the service by the selected payment method — you pay for the service directly by any payment method without using your personal account. For example, by bank card or transfer. You can also save your bank card or e-wallet details in Payment methods. You can then use this card or wallet to pay for services and subscribe to services. Read more about this in Payment methods.
Advance payment
You can issue an advance payment invoice if you want to top up your personal account balance and use the money to buy new services or renew existing ones.
If you create an advance payment without linking to a specific service, the invoice will indicate "Advance payment".
Account topup
To top up the balance of your personal account:
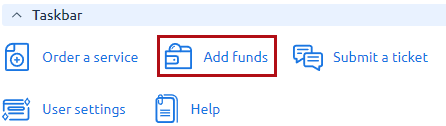
- Open the settings of your client area in the upper right corner, click Add funds.
- Specify the amount, currency and select the payment method. Press the Pay button.
- Select an existing payer or create a new one. Specify information about the payer. Press Continue.
- Press the Pay button to confirm the payment. After that, you will be redirected to the website of the selected payment system to make the payment.
The funds will be credited to your personal account.
You will find the paid invoice under Finance and documents → Invoices tab. When the payment is received, the status of the invoice will change from "Payment in progress" to "Sent".
Auto-payment
Auto-payment is an automatic topup of your personal account when your balance is low. Making a payment will not require your participation, and the balance will be topped up to an amount sufficient for a month. At the moment, auto-payment is performed through the following systems:
- Stripe;
- PayMaster;
- SimplePay;
- PayOnline.
Note:
Availability of the above systems depends on your provider's settings.To set up auto-payment:
- Open the settings of your client area in the upper right corner, click Auto-payment .
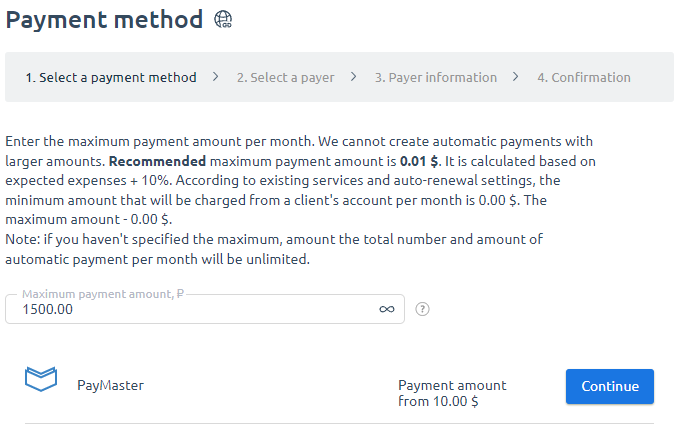
On the settings form, specify a limit in the form of the maximum amount to top up the account by in a month and press the Unlimited button. - Select the payment method and press Confirm.
- Select an existing payer or create a new one. Press Continue.
- Enter the information about the payer and press Continue.
- Press Continue to confirm.
- The page of the payment system will open. Enter the details of your payment method and make a test payment — the system will check that your card works, and the money will be credited back. The payment system will now be able to make payments for your provider's services automatically.
Payment by selected method directly
- Go to Billing → Auto payment → Configure.
In the setup form, select a payment method and the maximum amount you can top up your balance in a month. Click Continue.
Payment by selected method
Select a payer or create a new one. Click Next.
Specify the payer information and click Next.
Click Confirm. This will allow the payment system to automatically make payments for your provider's services.
How to pay by Wire transfer
When paying by wire transfer, a bank account is automatically generated to pay for services. Invoice formation algorithm:
Step 1. Choose Wire transfer and click Pay.
Step 2. Select a payer. You can select an existing payer or add a new one.
Step 3. Fill out the form and click Pay. The system will generate an invoice with banking details of both parties. You can print the invoice in the Accounts section.
Checking the balance and spent funds
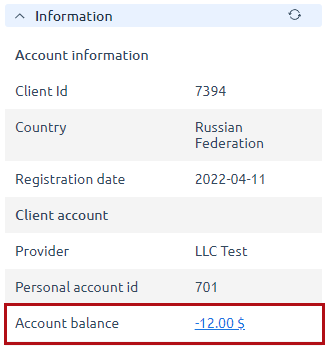
The balance of the Personal account is displayed in the upper right corner.
You can see information about funds withdrawn from the account for ordering goods and services under Billing → Expenses.
Expense history
You can set your expense display period or select one of the available default options: month, quarter, 6 months, year.
- Date — the date when the funds were withdrawn from your account;
- Operation description — the product or service for which your account has been charged;
- Amount — the amount withdrawn for a good or service;
- Tax — the tax paid for a good or service;
- Not paid — unpaid amount for a product or service;
- Transaction number;
- Payment number — the payment from which the funds were taken to pay for the specified service. It can be either an advance payment or a payment for a certain service.
To view information about funds debited from the account for ordering goods and services, go to Billing → Expenses.
- Name — the product or service for which your account was debited;
- Date — the date on which the funds were withdrawn from your account;
- Amount — the amount written off for the product or service;
- Payments — payment from which funds were taken to pay for the specified service. It can be both advance payment and payment for a certain service.
Payment for a particular service
If you have chosen a service, you can pay for it immediately. To do this, click Pay or Add to cart. Enter the amount and choose the payment method. When paying for a particular service you will be redirected to the payment system’s web page. After your payment has been processed, the service will be activated
Note:
Services that are charged daily cannot be renewed. Charges for them are deducted from the personal account.