Paid support
By default, clients are not charged for technical support. However, BILLmanager allows to provide paid support services in two different ways:
- Charge a client for provided technical support
- Set per-incident support
Per-incident support
Per-incident support allows providing technical support services on a paid basis. Support incidents are specified for every department, so tickets for some departments can be free, and other departments may require an incident.
There are several ways to add support incidents to a client's account:
- Automatically when certain actions are performed.
- When a client buys a support incident.
- Manually.
Purchasing incidents
To allow your clients to buy support incidents, you can create one or several tariff plans (the product type is Per-incident support.
Set up a data plan:
- Enter Products → Product types → Per-incedent support → Edit.
- Enable in Order Period the period One-time.
- Press Ok.
Enter Products → Tariff plans → Add.
- Select the product type Per-incedent support.
You can choose the following order periods for the tariff plan:
- A lifetime period — lifetime incidents will be added to the client's account. You can change the number manually. We recommend that you select — Value packages in the "Values scale" field. Clients can buy support incidents, but cannot cancel them.
Periods that can be divided by a month (one month, half-a-year, one year, etc.). Incidents will be added based on the number of services. Unused incidents will be reset when the service expires.
Example: on April 11 a client orders a paid technical support service (the package includes 10 incident) for 3 months. He has 10 incidents from April 11 till May 10, 10 incidents from May 11 till June 10, and 10 incidents from June 11 till July 10.
Note:
Daily charges and trial periods cannot be used for setting up paid support.
- Configure the remaining parameters of the tariff plan. Read more in How to create and configure a tariff plan.
You can mix order periods in one tariff plane. Note: when renewing a service for a lifetime period, the client will be given lifetime incidents. Existing unused incidents will be available until their expiration date.
You can set the number of support incidents included into the tariff plan by changing the "Support incident" addon.
Having created the tariff, edit its contents:
- Enter Products → Tariff plans → select the created tariff → Options.
- Select Support incident and press Edit.
- Set the Value type – "Integer number".
- Set the Value scale type — "Value packages".
- Set the parameter Edit resource after order to "Only upgrade".
- Specify the required value in the field Tariff plan includes.
- Press Ok.
In provider's settings, enable automatic activation of support on request:
- Go to Provider → Providers → select the provider → Edit.
- In the Service auto-provisioning block, select the option Connect service to clients.
- Select the Tariff plan, which you have created earlier for the product type "Per-incedent support".
- Specify the Period – "Lifetime".
- Press Ok.
Adding incidents automatically
The billing system will add support incidents automatically provided that one of the following actions is performed:
- Client registration (or when the client is connected to the provider for the first time).
- First payment.
- First charge of the account.
- Client adds a certain amount of funds to his account to pay for services or make an advance payment.
Support incidents that were added automatically do not expire, and the client can use them at any time.
To make the billing system add support incidents automatically navigate to Providers → Provider → Edit:
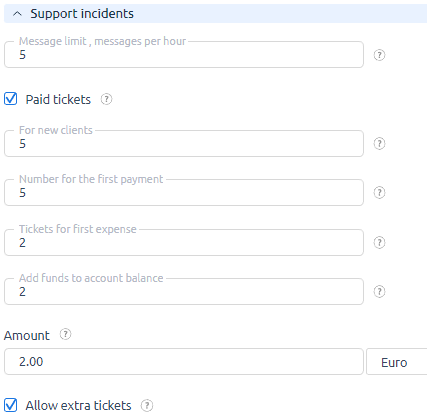
- For new clients — enter the number of incidents that the system will add after the client has been registered (or connected to a service provider).
- For the first payment — enter the number of incidents that the system will add after the client has made the first payment. Changing the payment status into "New" will deduct incidents from his account and can be added for another payment.
- — enter the number of incidents that the system will add when the provider charges him for the first time.
- For funds added to account and Amount — support incidents will be added to the client's account according to the value in the Amount field. The amount that was not used will be applied when making a new payment. Changing the payment status into "New" will deduct incidents from the account.
- Allow extra tickets — select this check box to allow staff members to deduct support incidents on credit. When he exceeds the specified limit, he won't be able to submit a ticket to the Technical support department unless he pays off his debt.
Adding incidents manually
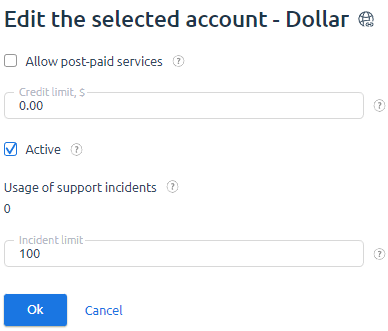
In some occasions you may need to add or deduct lifetime incidents from a client's account. Navigate to Clients → Clients → button Accounts → Edit:
- Usage of support incidents — the total amount of lifetime incidents that the client has used.
- Incident limit — enter the maximum number of incidents that the client can use.
Adding and deducting incidents
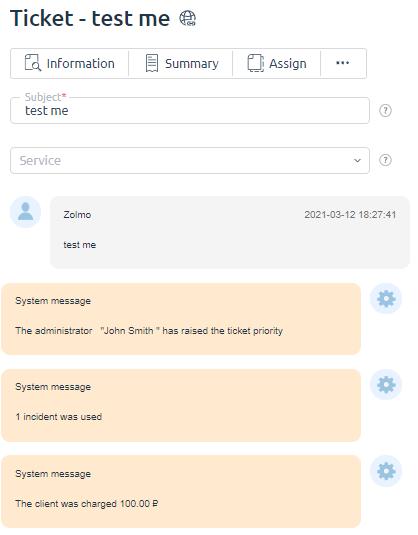
The system deducts a support incident from the client's account automatically when he submits a new ticket to a paid department. He will see the following system message on the ticket form:
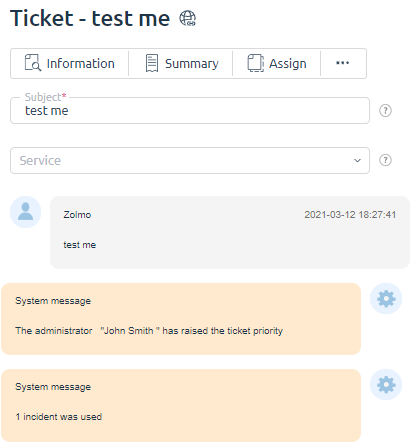
To set up the write-off of requests when sending a request to a specific department, go to Provider → Departments → Edit and enable the Write-off requests option.
Note:
If the per-incident support is not configured, the option Write off requests will be unavailable.
First the system deducts time-limited support incidents. If there are no such indents, it will deduct lifetime ones.
Staff can change the number of incidents that were used for the ticket in the Support incidents field:
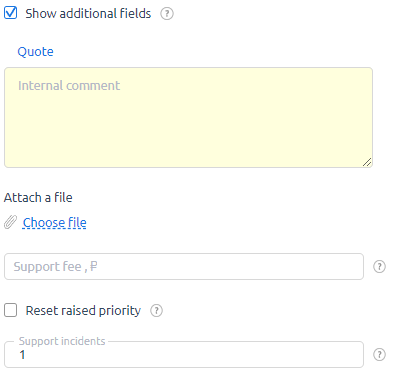
In the Support incidents field you can see how many incidents were deducted from the account. Decreasing this value will add the incidents back to the client's account, increasing will deduct more incidents.
Charging a client for provided technical support
This is the easiest way which doesn't require additional configuration. You can charge a client in the ticket by entering a required amount in "Support fee" in the ticket edit form:

Click Save parameters, Send reply, or Ok to charge the full amount without discounts. If there are insufficient funds on the client's account, the account will become negative.
The system will notify the client that he was charged.
The billing platform generates the corresponding expense in Billing → Expenses:
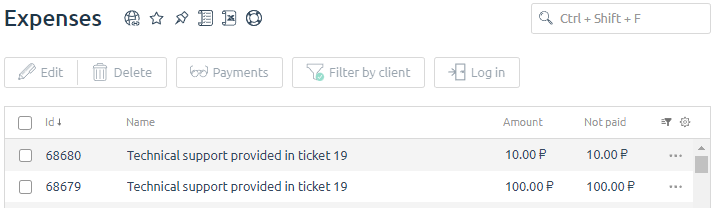
To make a refund, you need to delete or edit the expense.