Installing the BI module and configuring user permissions
The article describes how to install the module and configure user permissions to access the module.
ETL is a heavy load on the server, so we recommend that you install the module on a separate server.
Server requirements
To install the module on one server with BILLmanager, increase the server parameters by the number of resources required for stable operation of BILLmanager. For more details, see the article server requirements.
| Installing the module on a separate server | Installing the module on a server with BILLmanager | |
|---|---|---|
| Cores | 6 | 8 |
| RAM | 16 GB For large data storages: 32 GB | 20 GB For large data storages: 36 GB |
| Disk space | 80 GB | 130 GB |
Use an unmodified operating system with a basic configuration: no third-party repositories and no additional services installed.
Supported operating systems:
- CentOS 7 x64;
- AlmaLinux 9;
Ubuntu 20.04;

Note.
The mysql server version for Ubuntu 20.04 OS is at least 8.0.30.
Note:
Install the panel on the server with the latest minor version of the operating system.
Do not change the major version of the OS.
When installing on a separate server, make sure that it accepts incoming SSH connections.
On the server with BI, install python3:
Ubuntu 20.04
apt install -y python3CentOS 7, AlmaLinux 9
yum install -y python3Network settings
Allow on the server with BILLmanager:
- incoming connections to the DBMS (tcp/3306) from the server with BI panel;
- outgoing requests to the server with the BI panel via http/https.
Allow outgoing requests on the server with the BI panel:
- to the BILLmanager server to the DBMS (tcp/3306);
- to docker-registry.ispsystem.com via http/https.
Installing the module
Order a free license for the module: log in to your client area → go to Products → Modules → select BI (Beta) module → click Order.
The module is installed in two steps:
Step 1. Install the module:
- Enter Integration → Modules → select BI system (Beta) → click Install.
- Wait for the installation to complete, and then the system will open the BI initial setup window.
Step 2. Configure the module:
- Select a location option:
- On the same server as BILLmanager.
Specify the configuration settings:- BI panel address — select any of the addresses specified in the BILLmanager settings (can be viewed under Settings → Panel addresses);
- BI panel port — specify the port on which the BI system panel will be available;
- BILLmanager employee and BILLmanager employee password — enter the data for the account under which the integration will be set up.
- On a separate server.
Specify the parameters:- BI panel address — specify the address of the BI panel server, it must not coincide with the address of the BILLmanager server;
- SSH port — Specify the incoming port for connection to the server with the BI system panel;
Public SSH key, which must be placed on an external server in a file with the keys, for example, /root/.ssh/authorized_keys. The key must be placed on the server before the BI panel is installed on it, to do this on the server under the BI panel, execute:
echo 'ssh key' >> ~/root/.ssh/authorized_keysCODE
- On the same server as BILLmanager.
- Click Install.
- Wait for the message about the result of the installation. To see the results of the installation, enter System status → Notifications:
- The installation has been completed successfully. Proceed to configure access permissions, see Configuring employee access permissions to the BI system.
Configuring employee access permissions to the BI system
To configure employee permissions, enter Integration → Modules → select BI system (Beta) → click ![]() .
.
There are two levels of access to BI: Administrator and Employee. Select a user from the list and click:
- Enable or Disable, to set or remove the Employee level access;
- Enable administrator access or Disable administrator access, to set or remove the Administrator level access;
Access status:
 — access with employee permissions is enabled;
 — access disabled;
 — access with administrator permissions is enabled.
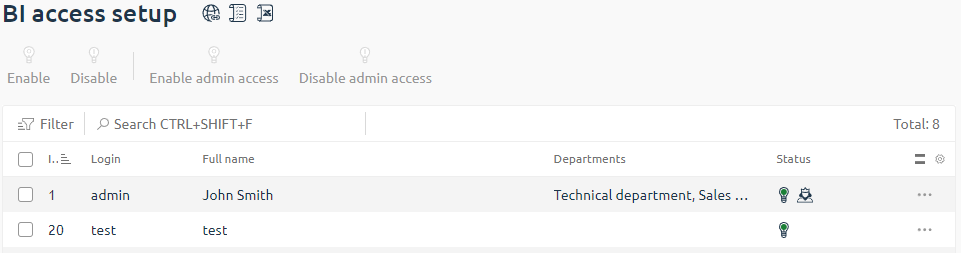
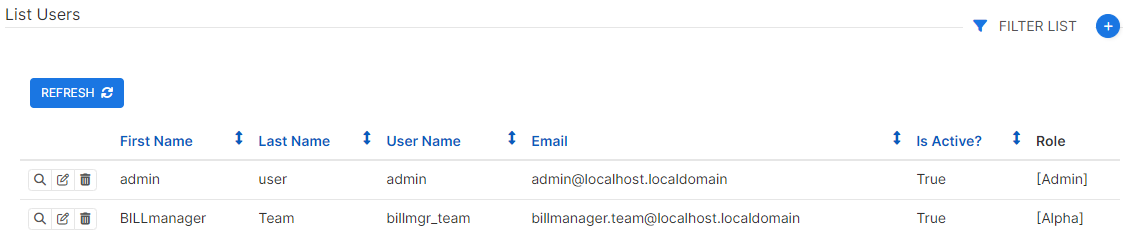
The corresponding user will be created in the BI panel. Only users with enabled access are displayed in the list.
After gaining access, the employee must refresh the page so that in the left menu of the web interface of the platform there is the Analytics section.
To enter the BI, in the Analytics section, click:
- Sign in — for users with employee permissions;
- Log in as Admin — for users with administrator permissions.
You will be redirected to the BI panel, which will open in a new browser tab.
Additionally
Main components:
- etc/business_intelligence/ansible/vars.json — the file contains parameters for BI deployment. Main parameters:
Parameter | Description |
|---|---|
bi_app_host | address of the server where the BI system is installed |
bi_app_lang | language in the BI system. The values "en" and "ru" are supported |
bi_app_password | superuser password in the BI system. Generated by BILLmanager automatically To log in as a superuser, follow the BI service address and log in as admin with a password |
bi_app_port | BI service port |
bi_dwh_password | password to the storage with which the BI system works |
bi_version | BI panel version |
bill_address | BILLmanager address |
bill_db_host | address of the DBMS server with the BILLmanager database for connection from the BI side |
bill_db_port | DBMS port with BILLmanager database for connection from the BI side |
bill_db_name | name of the BILLmanager database to be connected from the BI side |
bill_db_password | DBMS user password with the BILLmanager database for connection from the BI side |
bill_db_user | DBMS user name with the BILLmanager database for connection from the BI side |
bill_dist | BILLmanager version. Possible values: "3" |
bill_user | user in BILLmanager for using BI |
bill_password | password in BILLmanager for using BI |
docker_registry_url | docker registry address with the BI system |
- etc/business_intelligence/ansible/run.sh install — BI system installer. Uses the parameters specified in the vars.json file;
- etc/business_intelligence/ansible/logs/ — BI installation log files;
- etc/billmgr.conf — BILLmanager configuration file. Two parameters will be written to the BILLmanager configuration file after successful installation of the BI system via the platform interface:
- BIHost — address of the server with the BI system;
- BIPassword — administrator password for BI.
The BIHost and BIPassword parameters specified in the configuration files tell BILLmanager that the BI module is installed. Without this data, the BI module will be displayed in the BILLmanager interface as not installed.
The bi_app_host and bi_app_password parameters in etc/business_intelligence/ansible/vars.json are the same as BIHost and BIPassword in etc/billmgr.conf, respectively.
Logging
- etc/business_intelligence/ansible/logs/ — BI installation logs.
BI logs are stored in docker containers:
- etl — BI module component for moving data from MySQL to data-warehouse (Clickhouse) service. The etl logs contain information about connection to the BILLmanager database;
- bi-app — interface with charts and dashboards. Logs contain requests to the superset service.
To open the logs of the required container, run the command:
docker logs <container_name> - --since <value> — output logs from a specified time
- -f — view logs in real time
For more information, see the Docker documentation.
Move the BI system to another server
To move the BI system to a separate server:
- On the server for the BI system
Install python 3:
Ubuntu 20.04
apt install -y python3CODECentOS 7, AlmaLinux 9
yum install -y python3CODEPlace the public SSH key, for example, in the /root/.ssh/authorized_keys directory:
echo 'key' >> ~/root/.ssh/authorized_keysCODE- On a server with BILLmanager:
- In etc/business_intelligence/ansible/vars.json, specify the new server values for the parameters:
- bill_db_host;
- bill_db_name.
Run the BI installation script from the /usr/local/mgr5 directory:
./etc/business_intelligence/ansible/run.sh installCODE
- In etc/business_intelligence/ansible/vars.json, specify the new server values for the parameters: